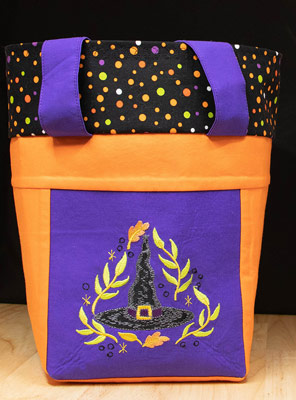
What child wouldn’t love a brightly colored Trick or Treat Bag embroidered with adorable Halloween designs? Simple to make and the results are awesome! Even add some personalization for your little gremlins. It’s guaranteed to be the first thing they look for when the decorations come out!
Supplies
- OESD’s Happy Halloween #12795 embroidery collection
- OESD StabilStick CutAway stabilizer
- OESD Fuse and Fleece
- OESD Fusible Woven
- Two 16” x 13” pieces of fabric for lining
- Two 11” x 13” pieces of fabric for outside
- Optional – Contrasting fabric for the border of your outside embroidery
- Two 16” x 5” pieces of fabric for the handles
- Two 16” x 13” pieces of OESD Fuse and Fleece
- Two 11” x 13” pieces of OESD Fuse and Fleece
- Two 16” x 13” pieces of OESD Fusible Woven
- Two 11” x 13” pieces of OESD Fusible Woven
- Isacord Embroidery thread
- OESD Bobbin Thread
- Loop and Tail Wand
- Fabric pen or pencil
Instructions
Fold each handle piece in half lengthwise (right sides together) and press.

Open and fold each side toward pressed line and press. Then fold in half and press again.
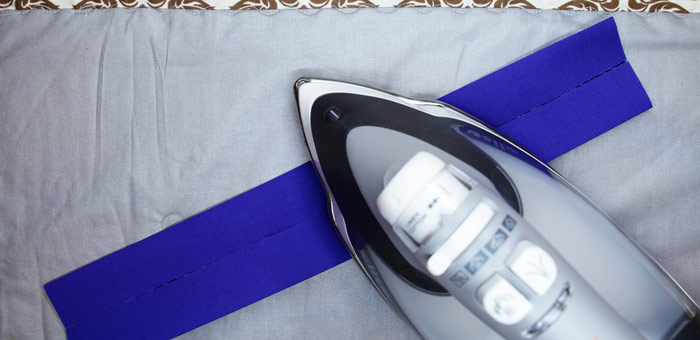
Topstitch 1/8″ from the outside edge on each side of pressed handles. Set Aside.

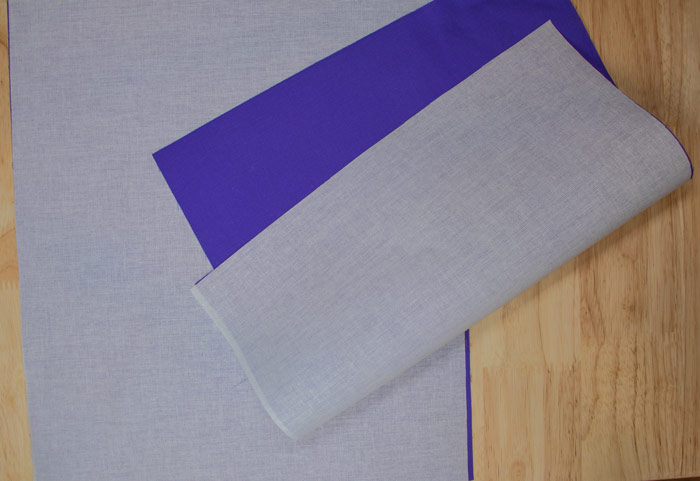
Apply Fusible Woven to the wrong side of both 11″ x 13″ outside pieces, following label instructions.
Hoop OESD StabilStick CutAway Stabilizer. Use a Loop and Tail Wand to score paper backing and remove to reveal the tacky stabilizer.

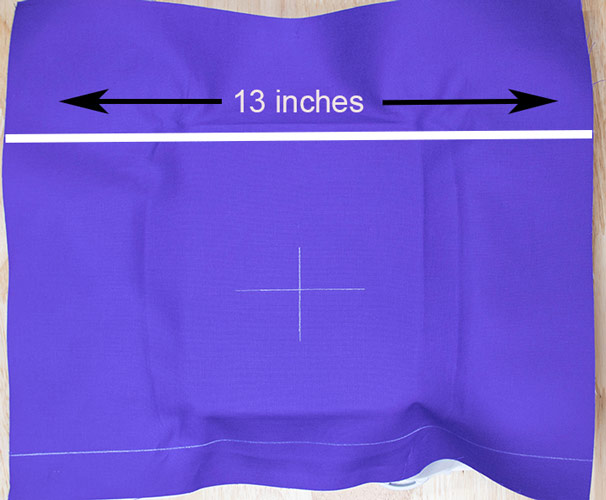
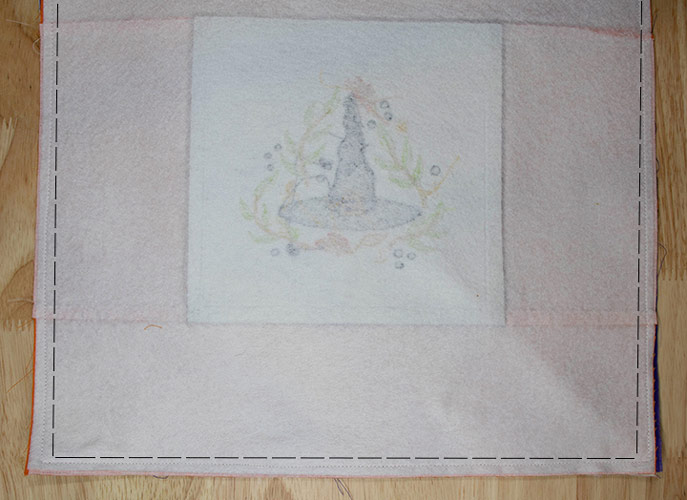
Using a fabric pen or pencil, draw a line 1″ from top of outside fabric and another line 3″ from the bottom of outside fabric. Your lines will be 13″ long across the width. Your design will be centered between the 2 lines – mark with a crosshair. Place your fabric onto stabilizer centering the crosshair with the center marks on your hoop.
Embroider your choice of designs on both outside pieces. Use the printable thread chart as a guide to thread changes. ** Optional – cut your embroidered fabric smaller and dd a border of fabric around your embroidered panel for extra style! Just make sure the finished piece measures 11” x 13”

Fuse the Fuse and Fleece pieces to the wrong sides of both lining pieces and outside pieces.
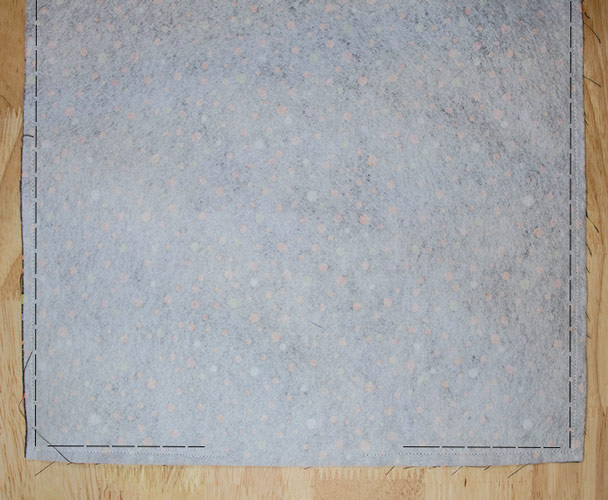
Sew outside pieces together on bottom and sides using a 1/4″ seam allowance.
Sew lining pieces together on bottom and sides using a 1/4″ seam allowance. Leave about 3″ open in the center of the bottom of the lining. You will use this to turn right side out later.
Fold each corner matching the seams. Measure up 3″ along the seam line and then perpendicular across the seamline 6″ to create the stitching line to box the corners. Mark on the 6″ line.
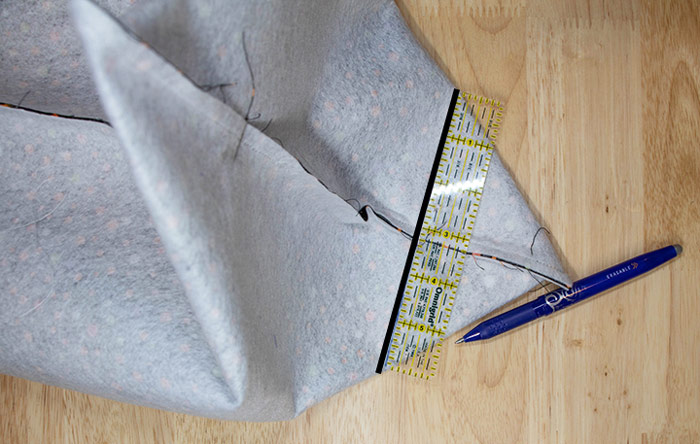
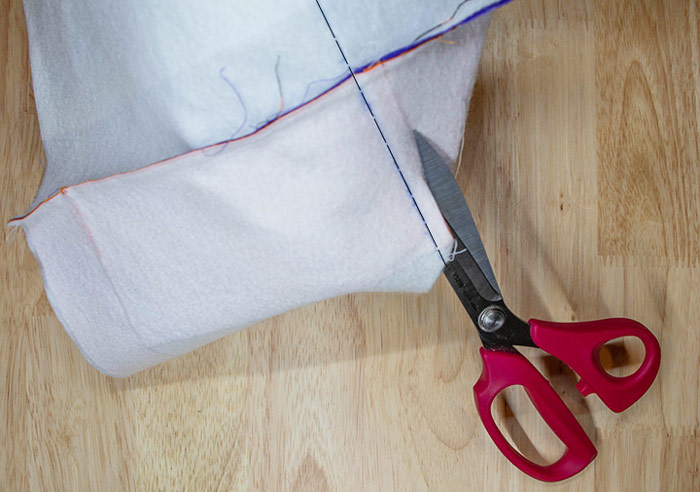
Stitch along this line. Do this for both corners on the outside and the lining pieces. Trim corners about 1/4″ from stitched line.
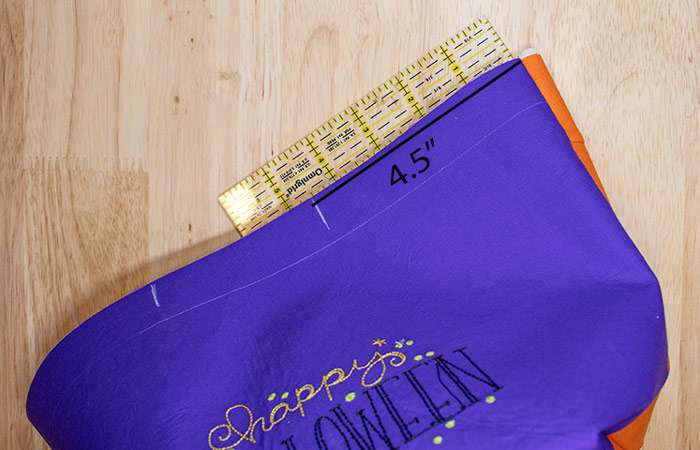
Measure 4 1/2″ from each side seam on the outer bag toward the center and make a mark. Do this on both sides of the outer bag.
Align the inside of the handles on the marks with the raw edges matching the raw edges of the bag. Machine baste into place. Be careful not to twist handles.
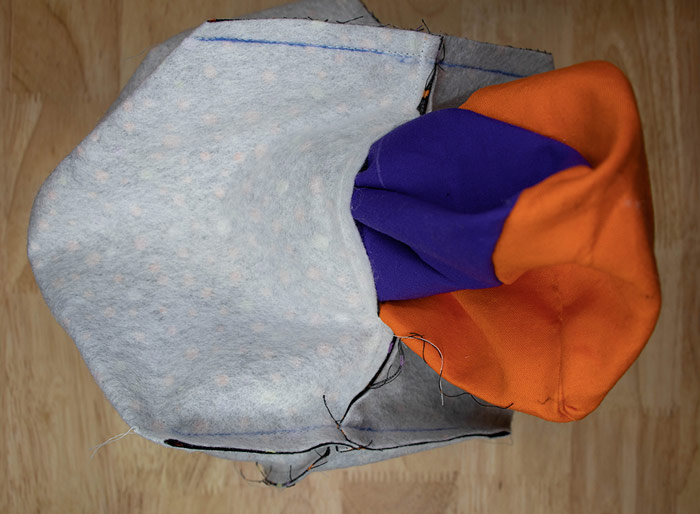
With outside of bag right side out and lining right side in, place the outside of the bag inside the lining. Line up side seams. Be careful not to catch handles in the seam allowance. Stitch the outside to lining with a 1/4″ seam allowance.
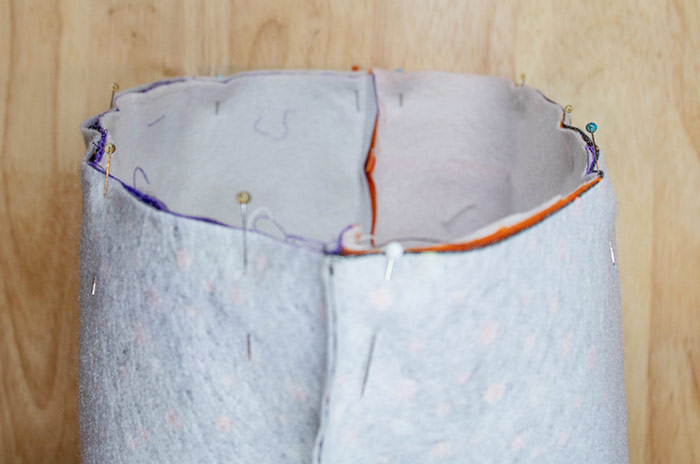
Pull outside through the opening in the bottom of the lining.
Hand or machine sew lining opening closed.

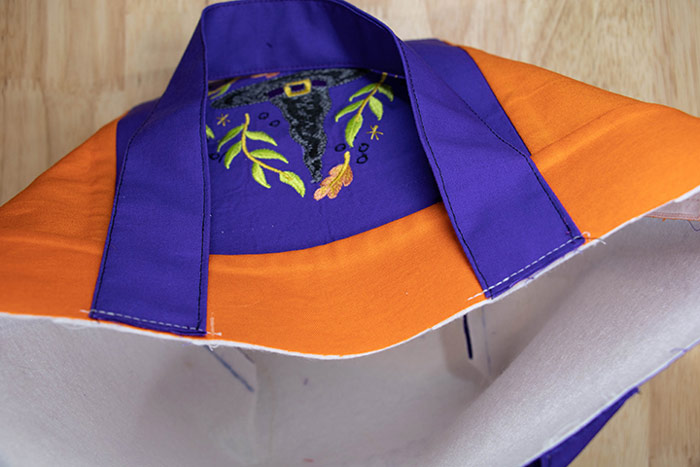
At this point, your bag should look like this.

Push lining down into outside matching the corners. The lining is longer so that it will make a border around the top of the finished bag. Once the lining is folded in place, top stitch around the top of the bag. This is a good time to choose one of your decorative stitches. Once you have topstitched, your bag is complete!
This material is © OESD, LLC and may not be reproduced or published without permission.