
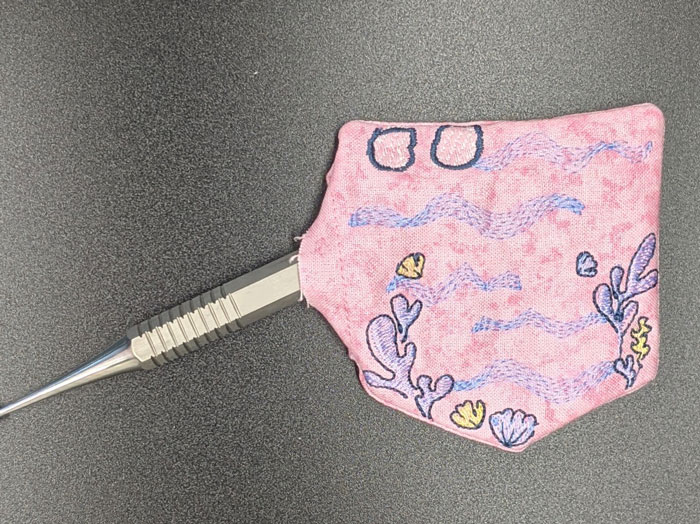
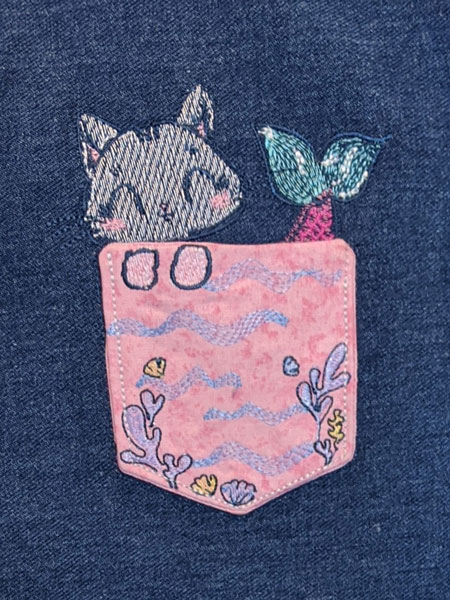
It doesn’t get any sweeter than adorning a child’s apron with a magical fantasy creature, Pocket Peeker. The MerCat is 50% mermaid, 50% cat, and 100% adorable! This design from Scissortail stitches collection #51240 is a two-part design; the pocket embroidery design is one hooping, and the pocket placement is the second hooping. Let’s get started!
Supplies
- Scissortail Stitches’ In The Hoop Pocket Peekers #51240 embroidery collection
Designs #25 and #26 - OESD Fusible Woven
- OESD Fusible PolyMesh CutAway
- OESD StabilStick TearAway
- Child’s Apron
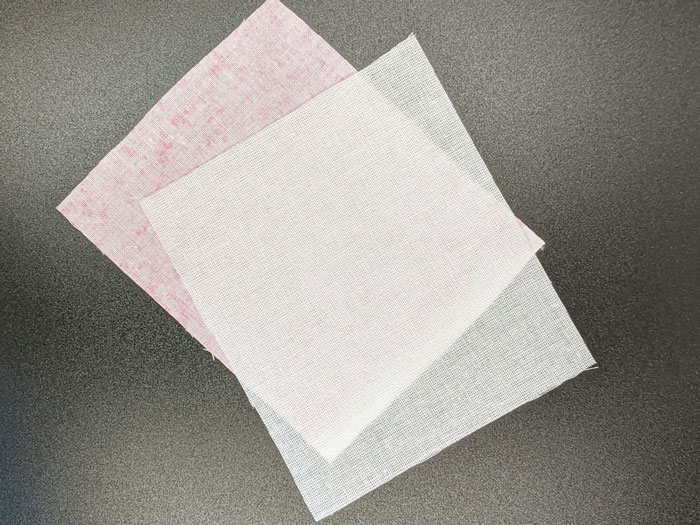
- 2 squares of 4” x 4” cotton fabric
- Mini Rick Rack- 1 package
- Isacord Threads per thread chart
- Organ Embroidery Needle 75/11
- OESD Expert Point and Press Tool
- Expert Embroidery Tape TearAway
- OESD Perfect Embroidery Press Cloth
- OESD StabilStick Template Sheets, TearAway
- Scissors
- Fabric Marker
Instructions
Step 1
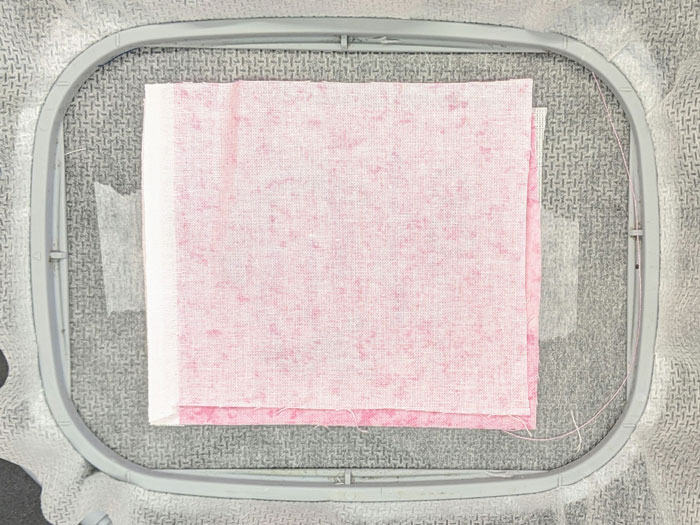
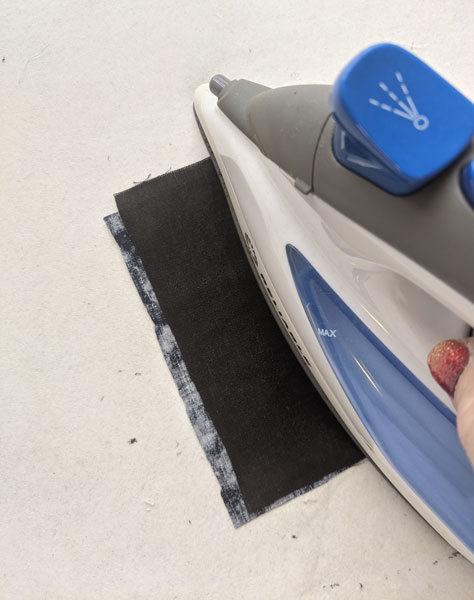
(Fabric requirements are for the small pocket design.) Cut two pieces of the cotton fabric 4″ x 4″. Press Fusible Woven to the wrong side of one piece 4″ x 4″ cotton fabric.
Step 2
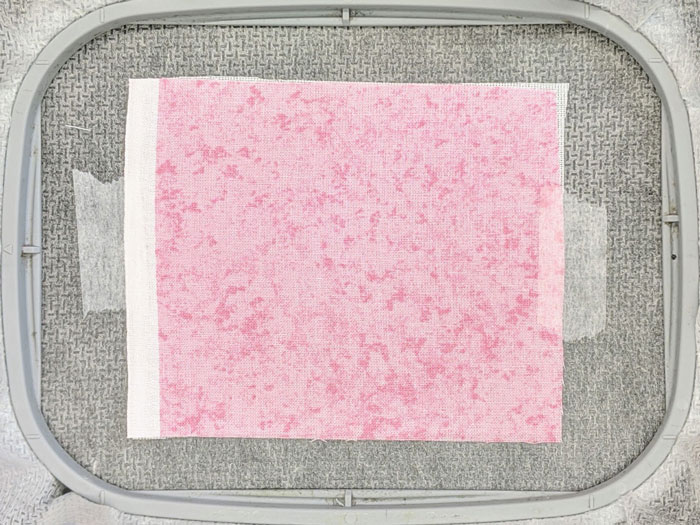
Load the machine with Design 51240-25 Stitch ‘N’ Turn MerCat Pocket Small. Hoop 1 layer of Fusible PolyMesh, shiny (fusible) side down. Tip: The lining will fuse to the PolyMesh in the final pressing creating a nice crisp finish by hooping this way.

Step 3
Stitch Machine Step 1, Fabric Placement Stitch.
Step 4
Place the prepared fabric square right side up, covering the placement stitch entirely. Tape in place.
Step 5
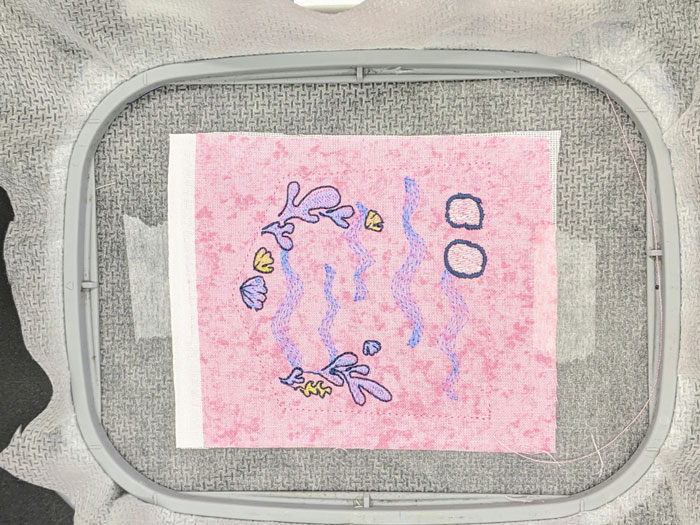
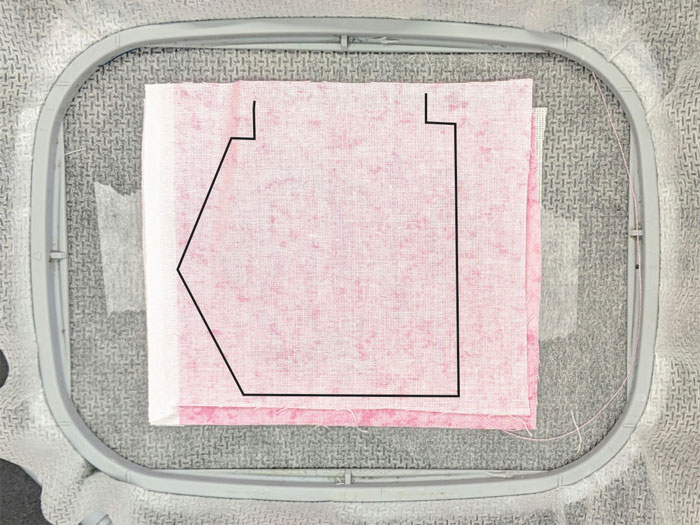
Stitch Machine Step 2, Fabric Tackdown. Continue stitching the colors as shown in the thread chart. Stop before the last machine step.
Step 6
Place the second fabric square right side down, over the stitched pocket, covering entirely. Tape in place.
Step 7
Select a thread that matches your pocket fabric. Stitch Machine Step 8, Seam Stitch Match Fabric.
Step 8
Remove the pocket from the hoop. Trim the pocket about 1/8-1/4″ from the seam. Trim corners.
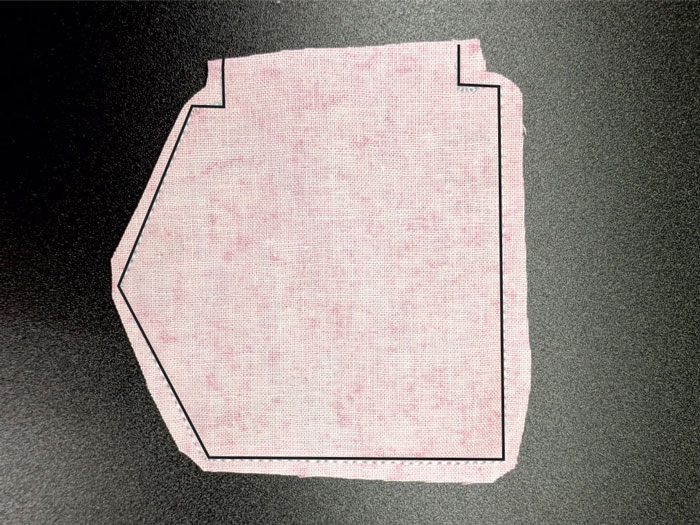
Turn right side out, use OESD Point and Press Tool to push out the corners.
Step 9
Turn the ‘neck’ into the pocket and press face down on the Perfect Embroidery Press Cloth.
Step 10
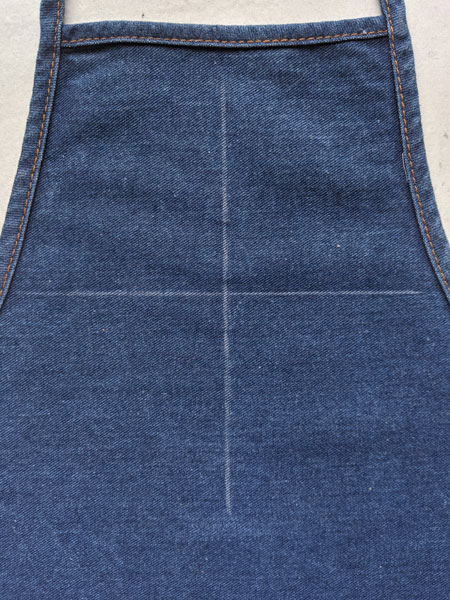
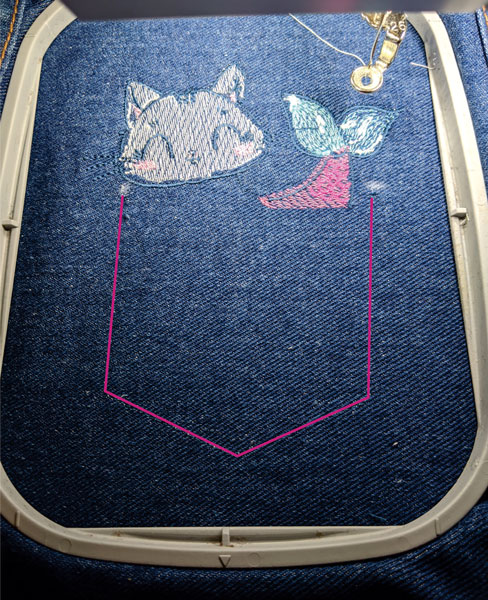
Embroider the Pocket Peeker onto the apron. Mark a vertical and horizontal line for placement guidelines for the pocket center. Load the machine with Design 51240-26, MerCat Pocket Placement Small.
Step 11
Using StabilStick, print out the template included in the design instructions following the printing instructions.
Tip: Print templates at 100%. No scaling.
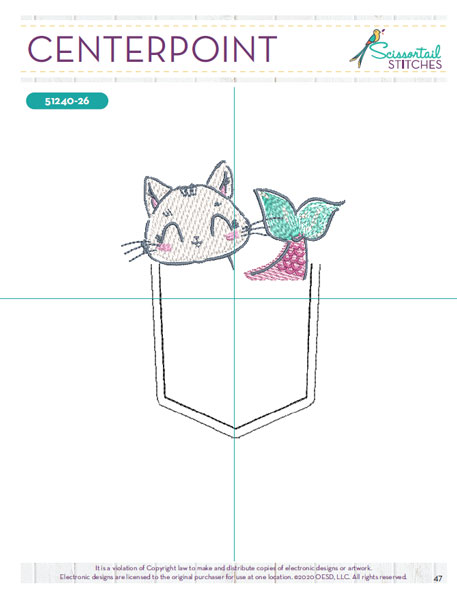
Trim close around the design template and peel the backing off.
Step 12
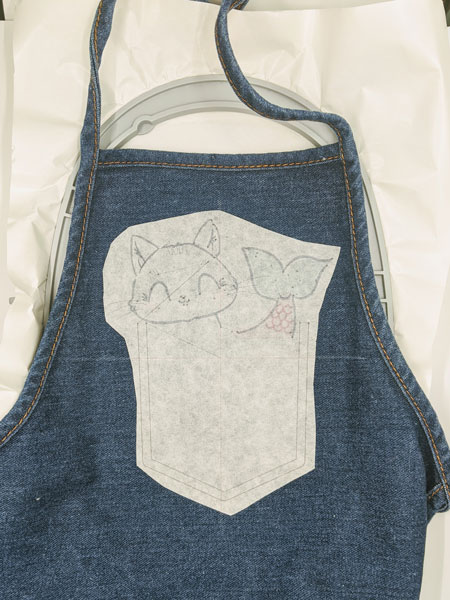
Line up the center lines on the template with the center lines drawn on the apron. Adjust if needed.
Step 13
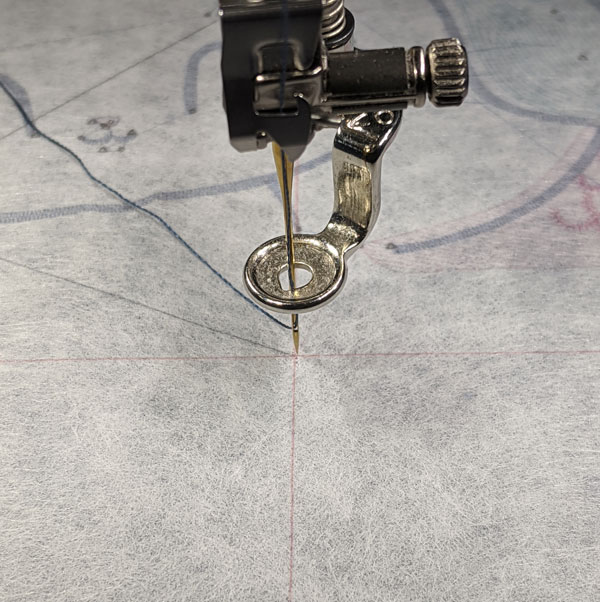
Hoop a piece of StabilStick TearAway with the paper up. Score the paper with a needle or pin, careful not to score through the stabilizer.

Step 14
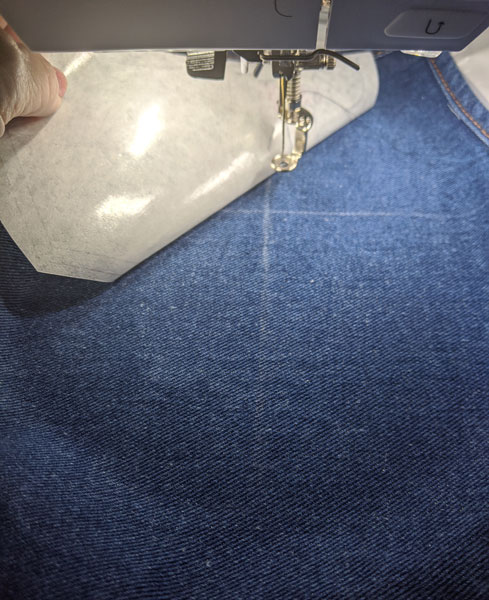
Adhere the apron to the stabilizer using the center top hoop mark and the center side hoop marks for placement.
Step 15
Place the hoop onto the machine. Use the machine’s placement tools to center the design.
Step 16
Remove the template from the apron.
Step 17
Stitch the design, stopping before Machine Stitch 7, Pocket Placement Stitch Match Fabric. Thread the machine with a top thread that matches the pocket fabric.
Step 18
Machine Stitch Step 7, Pocket Placement Stitch Match Fabric.
Step 19
Place the pocket on the apron, matching the pocket’s edges with the placement stitch on the apron. Tape in place to secure. Stitch Machine Step 8, Pocket Tackdown Match Fabric.
Step 20
Remove the hoop from the machine. Gently tear the stabilizer from the apron. Press right side down into a Perfect Embroidery Press Cloth.
Optional Pocket
Step 1
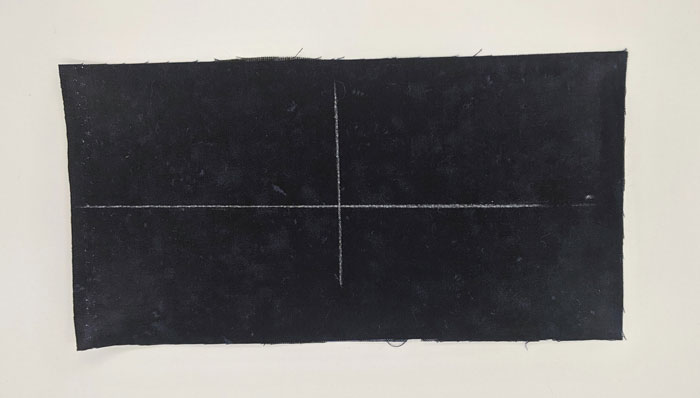
The long pocket at the bottom was two 8.5” x 4.5” rectangles. Press Fusible Woven to the back of one piece.
Mark horizontal and vertical center.
Step 2
Hoop StabilStick TearAway with the shiny paper side up. Score the paper with a needle or pin. Be careful to not cut the stabilizer.
Adhere the pocket fabric to the stabilizer. Choose a font on the machine and center the needle over the center mark. Stitch design.
Step 3
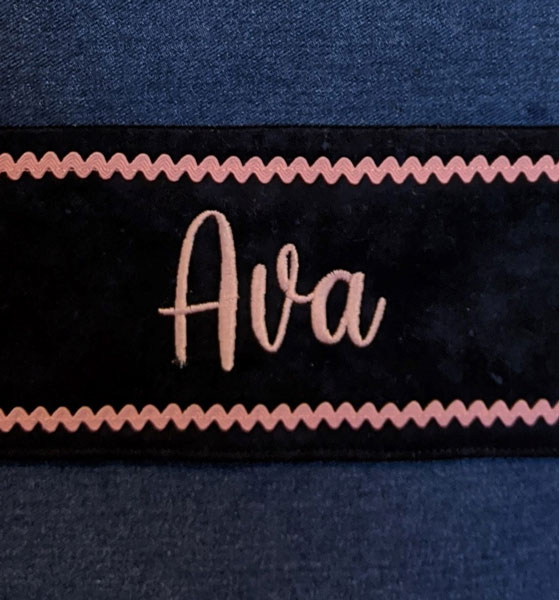
Remove the pocket carefully from the stabilizer. Press the pocket right side down on a Perfect Embroidery Press Cloth. Mark a straight line ¾” from the top and bottom long edges. Align the rick rack along the lines and sew to the pocket.
Step 4
Put pocket and lining right sides together. Sew with a 1/4” seam allowance, leaving an opening in the bottom for turning. Clip corner diagonally and turn the pocket right side out. Use the Point and Press Tool to push the corners out. Press the pocket. Center the pocket on the apron, with the bottom of the pocket approximately 4” from the hem of the apron. Stitch around the sides and bottom.
Your apron is complete. Enjoy!
This material is © OESD, LLC and may not be reproduced or published without permission.