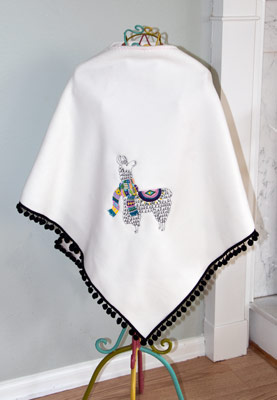
There will be no drama when you make this sew simple poncho to showcase your favorite llama. The poncho is one size that will fit a child (age 6-10). Easily modify it by making the initial square pieces larger or smaller.
Supplies
- OESD’s Llamas #12791 embroidery collection
- OESD StabilStick CutAway stabilizer
- OESD StabilStick Template Sheets
- OESD StitcH2O Water Soluble Topper
- OESD Expert Embroidery Tape – TearAway
- 1 yard 60” wide Fleece
- 2 ½ yards of ball fringe trim
- Isacord Embroidery threads
- OESD Bobbin thread
- Organ Ballpoint Embroidery Needle #75/11
- Dual Feed or Walking Foot (optional)
Instructions
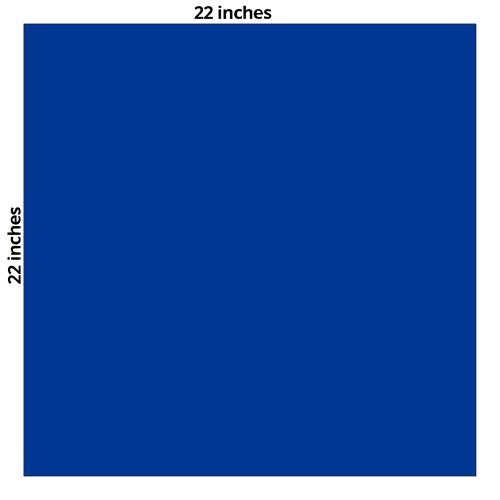
Cut Fleece into 2 squares measuring 22” x 22”.
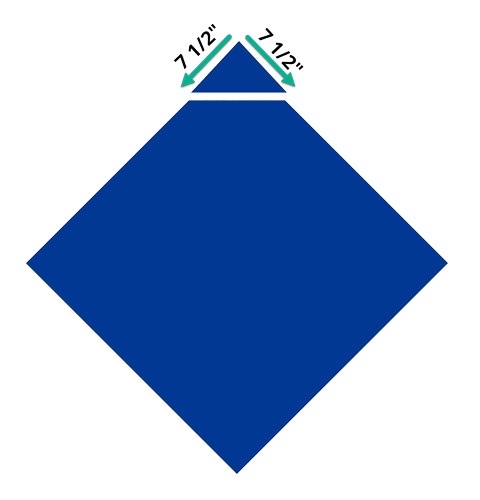
Measure 7½” down from 2 corners and cut corners off both pieces of fleece using your marks. This will be your neck opening.
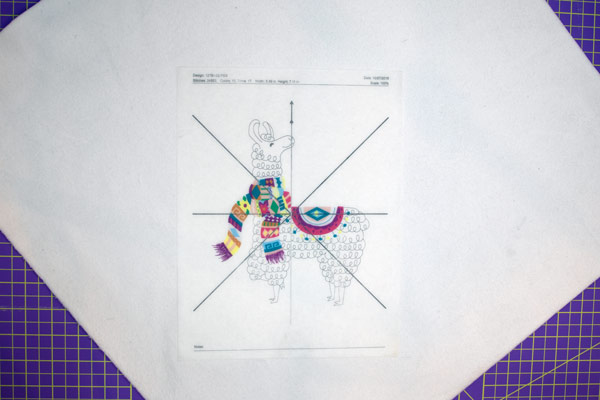
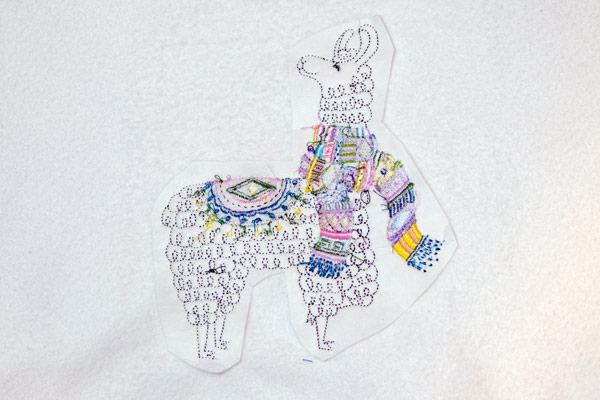
Print Llama design on StabilStick Template sheet using your embroidery software. Peel off the paper backing and position template on the front piece of the poncho.
Hoop StabilStick CutAway paper side up. Score paper and remove to expose the sticky surface.
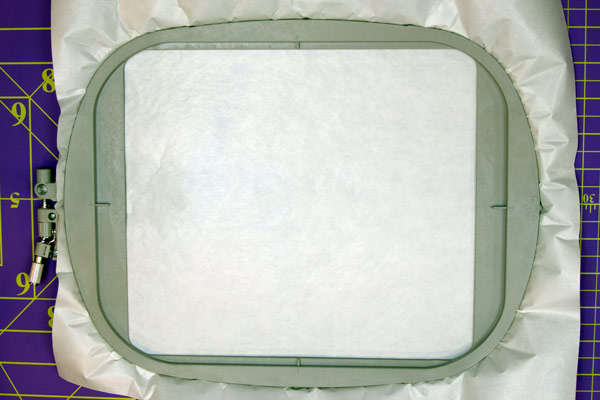
Finger press the fabric in place.
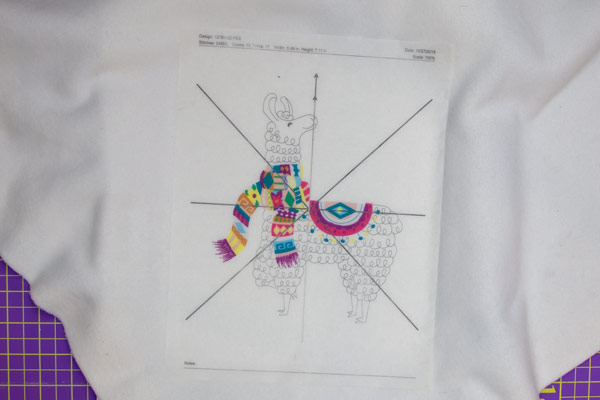
Align template under needle on the machine to get design centered perfectly. Remove StabilStick Template sheet before embroidering.
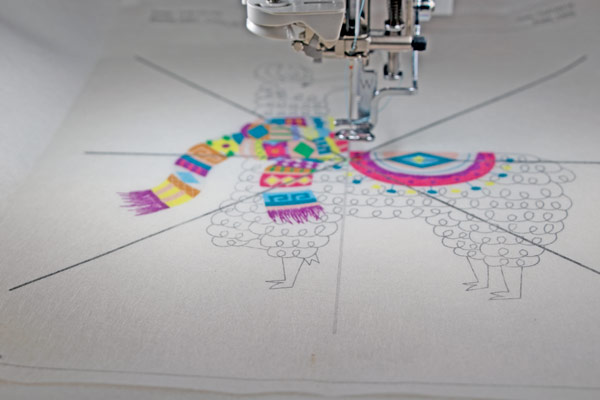
Place StitcH2O Topper over embroidery area and use OESD Expert Embroidery Tape TearAway and/or use the baste function on your machine to attach topper onto fabric to prevent shifting. Embroider design with Organ Ball Point Embroidery Needle.
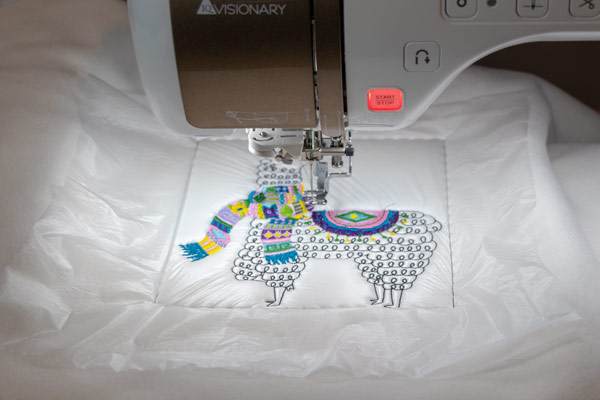
Cutaway stabilizer from the back of design ¼” to ½” from the design. TearAway excess Stitch2O topper and wet any areas that you cannot tear to remove all topper.
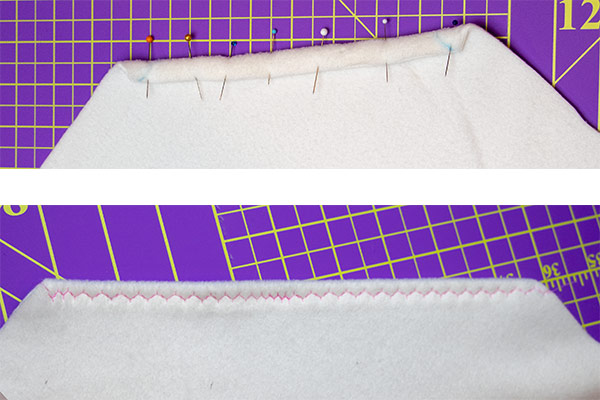
Pin edge of neckline ½”. Fold over once since fleece will not fray. Use a dual feed or a walking foot (if available) to stitch in place. This is a great time to try out some decorative stitches on your machine.
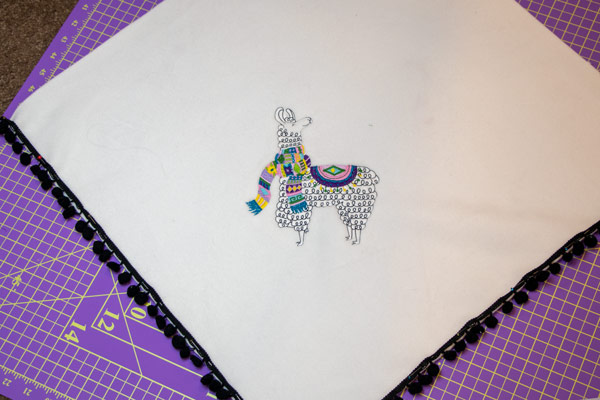
Pin and sew ball fringe to bottom sections of both front and back squares of fleece.
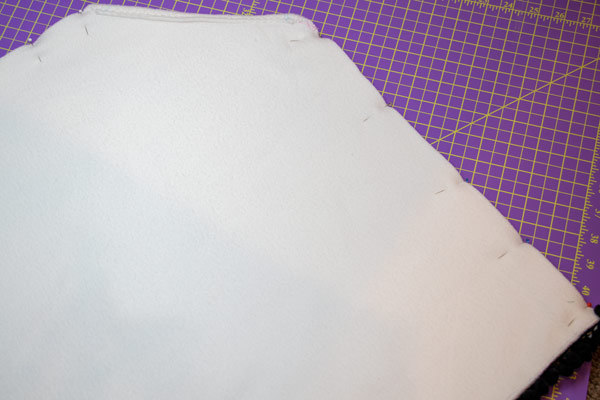
With right sides together, pin and sew side seams from neckline to bottom sides. Use a ½” seam allowance.
Turn right side out. The poncho is complete!
This material is © OESD, LLC and may not be reproduced or published without permission.