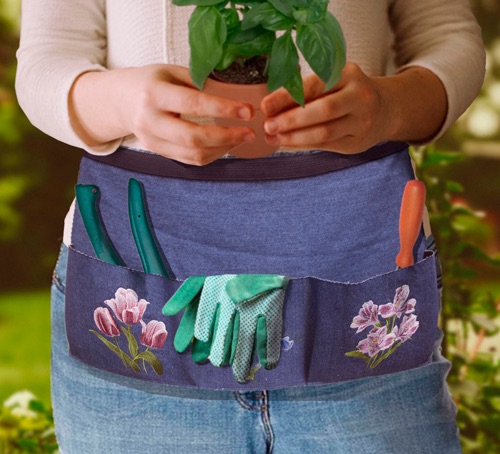
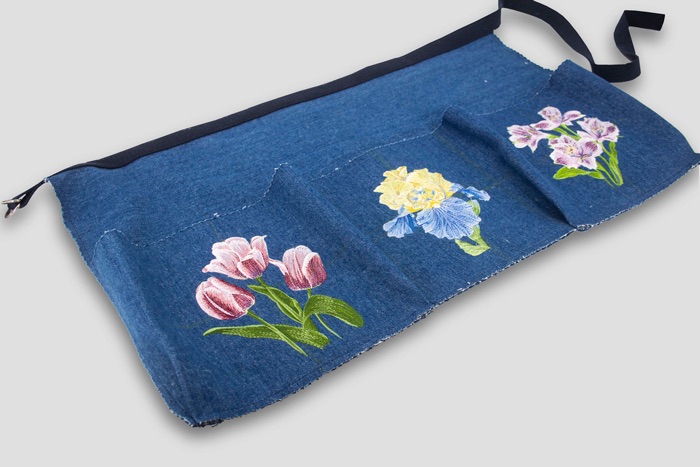
Working in the garden can be a very gratifying hobby, especially if all your tools are close at hand. This gardening apron was inspired by the natural beauty of the designs in Jane’s Garden by Jane Shasky #80282. The construction of this apron is very forgiving and can be easily adjusted to the wearer’s size and needs.
This example has a flat center pocket to keep seed packets or a cell phone in place when bending and stretching. The outer two pockets have pleats on the bottom corners to provide some fullness for keeping gloves and hand tools at your fingertips. Simple construction makes this apron a fun and practical gift for your favorite gardener!
Supplies
- Fusible Woven CutAway Black
- Ultra Clean and Tear Plus or StabilStick TearAway
- StitcH2O
- StabilStick Template Sheets (optional)
- Jane’s Garden by Jane Shasky (designs #80282-10, #80282-13, #80282-19)
- Isacord thread
- Organ 80/12 Sharp Embroidery Needle
- 3/4 yard denim
- Chalk marker or other fabric marking pen
- Rotary cutter with wavy blade or pinking shears
- 1¼ yard 1″ Navy twill tape or webbing
- 2 each 1″ D-rings
Instructions
Cut pocket fabric 9″ x 34″. Cut apron fabric 16″ x 28″. Apply Fusible Woven to the back of the fabric per printed instructions. Apply a second layer of Fusible Woven at a 45° angle. This will prevent the fabric from shifting during stitching. If a non-twill fabric is used, one layer of Fusible Woven should be adequate.

With a chalk marker, make a vertical line at the center of fabric and a horizontal line 5” from the bottom of the fabric across the entire width.

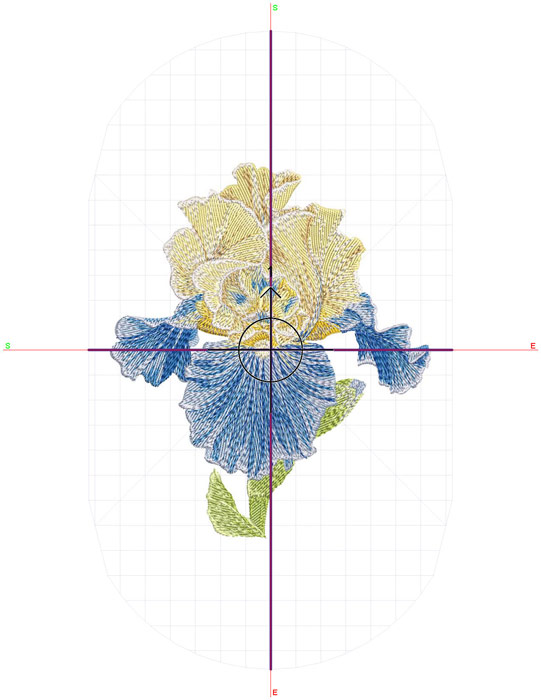
Using software, resize the design if desired. The center design, 80282-19 was resized up to 120% to better fit the space and the size of the other designs. Save the design to the stitch format for the machine. Print a design template on StabilStick Template Sheets. Trim away excess paper from the outer edges of the design.
Print templates for the other designs, if desired.
Hoop a piece of Ultra Clean and Tear Plus with the paper side up. Score the paper with pin, stylus or loop and tail wand. Remove paper from the hooping area to expose the sticky surface. Position the prepared fabric in the hoop with the vertical lines matching the top and bottom hoop markings or use the hoop template. Finger press to secure in place.
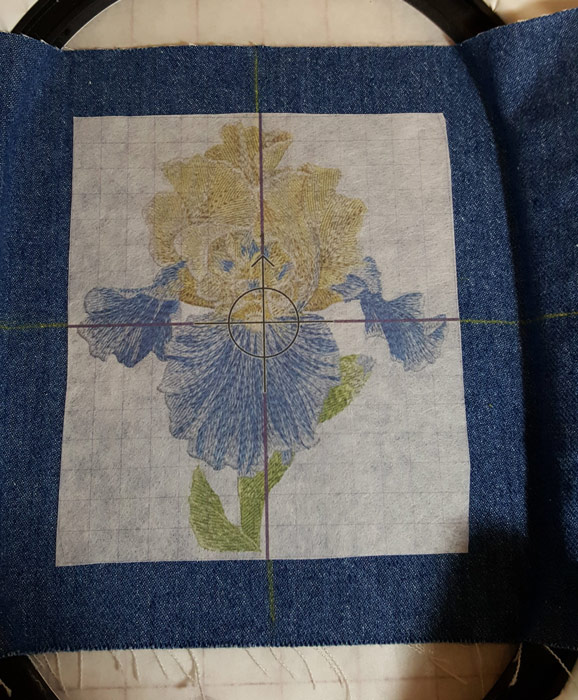
Use the hoop positioning tools to align the crosshairs of the template with the needle. CAREFULLY REMOVE THE DESIGN TEMPLATE. Cover the design area with a piece of StitcH2O topping.

Because the prepped denim is a bit bulky, it is a good idea to use the machine baste feature to secure the fabric to the stabilizer. This also has the added benefit of holding the topping in place during stitching.
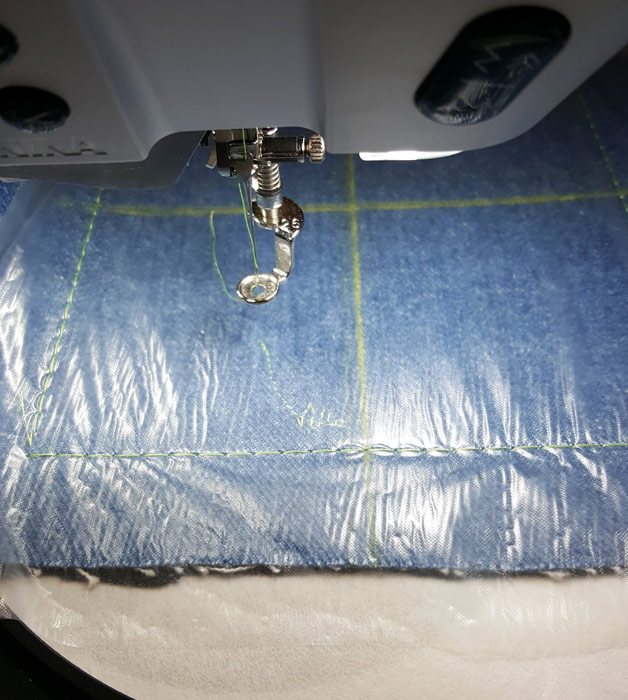
Follow the thread chart to stitch the complete design on the denim. Note – the topping keeps the thread from sinking into the twill of the fabric and make the design stand out beautifully.
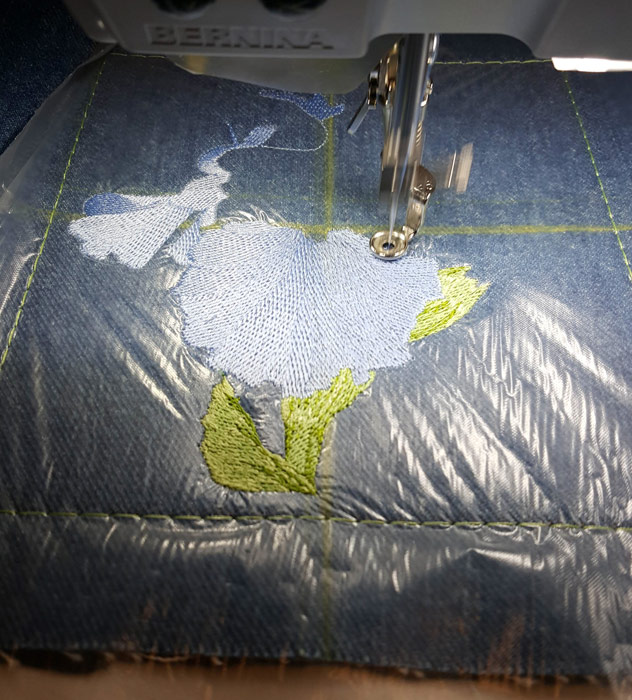
Remove the basting stitches. Tear away the excess StitcH2O topper (any smaller spots can be rubbed off with a damp rag or washed away). To easily remove the stabilizer from the design, cover the back of the design with a damp rag, or spritz with water, to disintegrate the stabilizer and then lift away the excess.
TIP: Ultra Clean and Tear Plus is a wash-away/tear-away stabilizer base with a water-soluble adhesive.

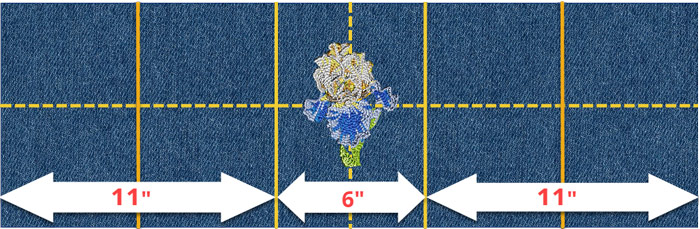
Mark a vertical line 3” from the center vertical line on each side. This defines the center pocket which is 6” wide. Mark the vertical center of each of the remaining sides. Based on the pocket fabric measurements, it should be 5 1/2 “ from the outside edges.
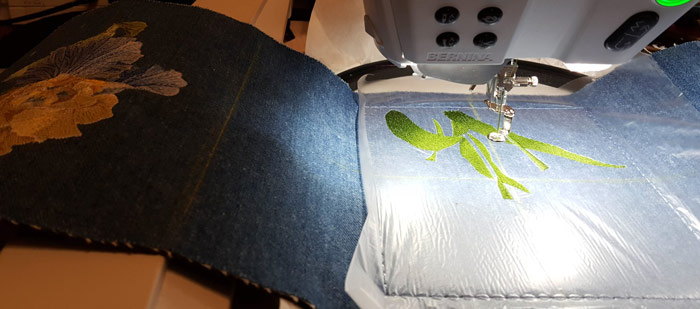
If using templates, position them over the two outer pockets, matching crosshairs, as shown in the photo. Stitch the right pocket.

When stitching the left pocket, it is best to rotate the fabric and the design 180º, as shown in the photo. This puts the bulk of the fabric over the hoop attachment to the left side of the machine, so it doesn’t have to be held captive under the arm and risk falling onto the sewing area.
Pink or rotary cut the top edge of the pocket fabric to prevent excess fraying of the fabric. Stay stitch 1/4” from the top edge.
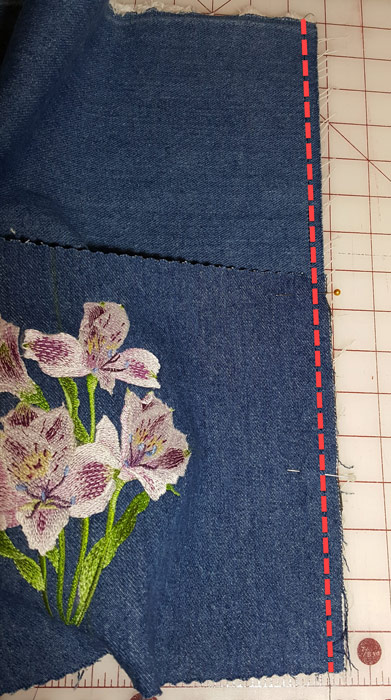
Match the center of the pocket fabric with the center of the apron fabric. Note – the pocket fabric will be wider on each side. Pin in place. Using a matching thread, stitch the two sides of the center pocket along the marked lines, as illustrated by the red dashed lines on the photo. A triple straight stitch will be secure the fabric nicely and keep the pocket from coming undone with use.
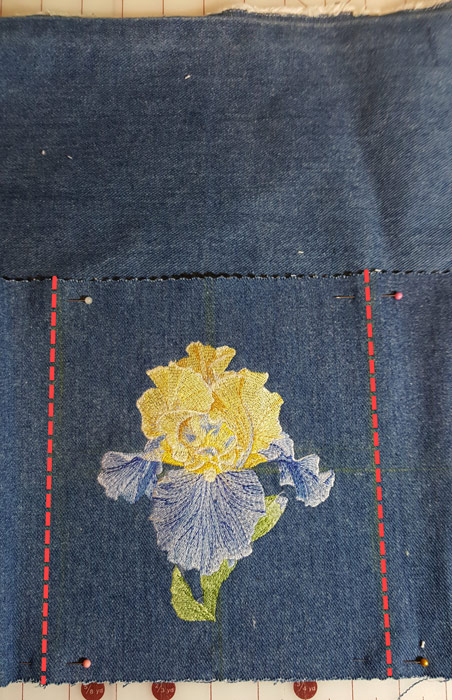
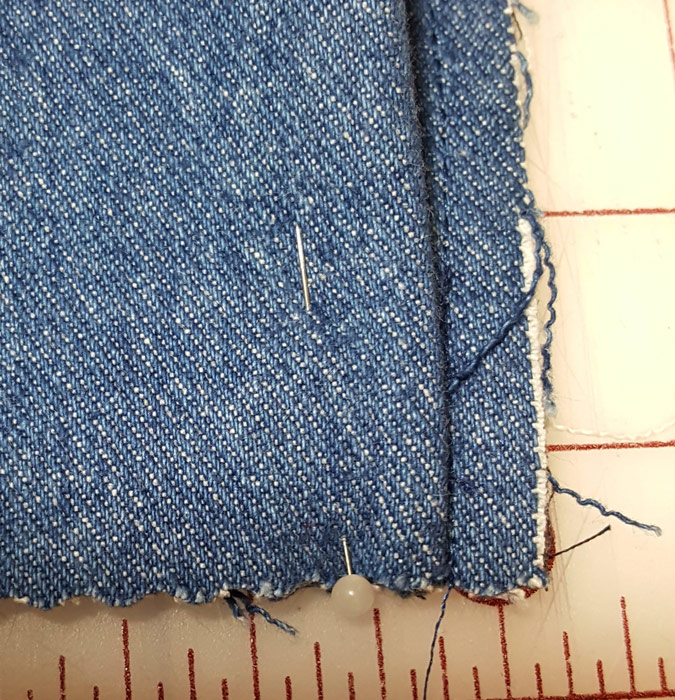
Pin the outside edges of the pocket fabric to the apron fabric matching sides and bottom edges. Using the same triple straight stitch, stitch each side 3/8” from the raw edges, as illustrated by the red dashed line in the photo.
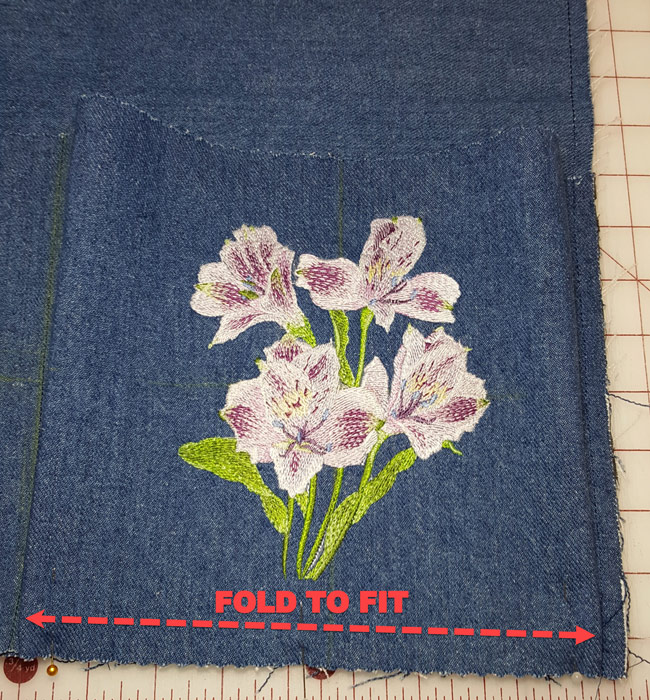
Fold under a pleat on each side of each side pocket and pin. No need to measure and be exact, just “eyeball” it. A gardening apron should be a bit organic!
Pin the pleats in place. Stitch the bottom pockets closed by sewing a triple straight stitch about 3/8” along the entire bottom of the apron. Using pinking shears or a wavy rotary cutter blade, trim about 1/8” of fabric from the bottom edge (both apron and pocket fabrics).
Loop the twill tape/webbing through the two D-rings and stitch across the webbing 1-2” from the D-rings and stitch across the webbing. Pin the webbing in place just below the upper edge of the apron fabric with the D-rings close to one side as shown. Stitch each side of the webbing onto the apron. Cut the long end of the webbing with enough length to fit comfortably around the waist. Stitch across the cut end of the webbing to prevent fraying.
This material is © OESD, LLC and may not be reproduced or published without permission.