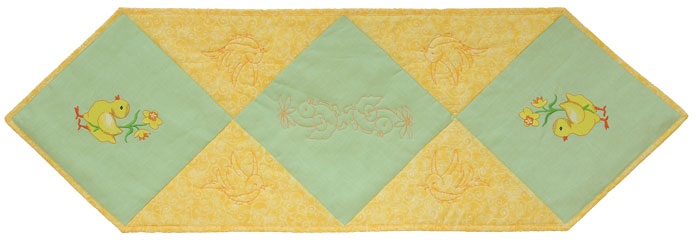
Create this fun, spring table runner featuring designs from Hoppy Easter by Heidi Boyd.
Supplies
- OESD’s Hoppy Easter by Heidi Boyd #80132 embroidery collection
- Fabrics:
- 3/4 yard center motif fabric
- 1/2 yard fabric for side triangles
- 3/4 yard fabric for backing and binding
- 18″ x 50″ piece of batting
- OESD Ultra Clean TearAway stabilizer
- Temporary spray adhesive
- Isacord embroidery thread
Instructions
Cut
• Cut two pieces of center motif fabric 12″ x 14″.
• Cut 1 – 15″ square of side triangle fabric, then subcut the square diagonally in both directions, resulting in 4 triangles.
• Cut 3 – 2¼” strips of the backing and binding fabric for binding.
Embroider
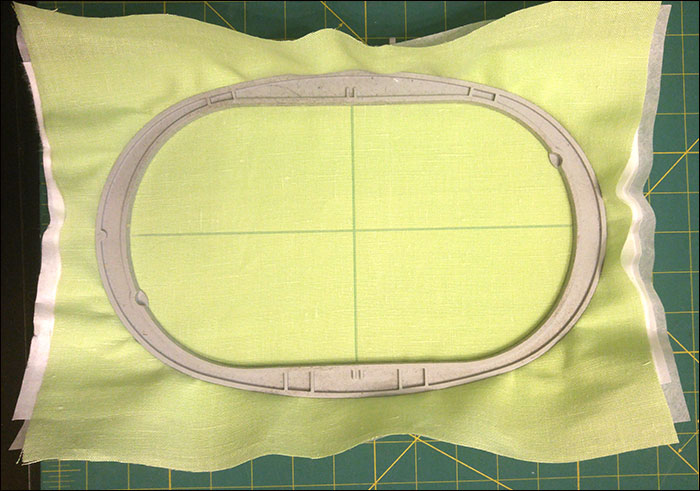
• Lightly spray together two layers of OESD Ultra Clean Tear Away stabilizer. Lightly spray one side of the stabilizer layers and attach to one of the 12″ x 14″ pieces of motif fabric. Mark the center of the fabric and hoop the fabric with the markings centered.
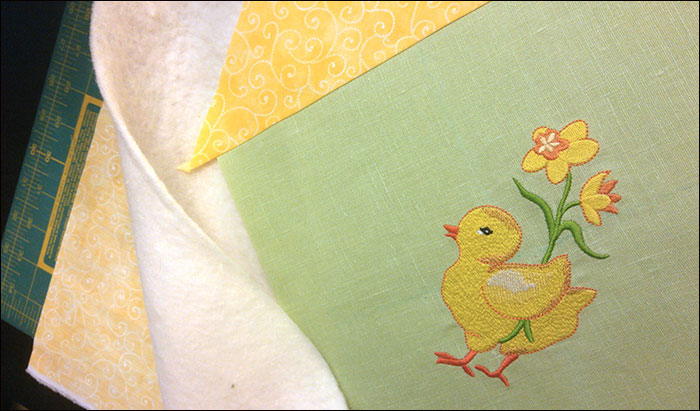
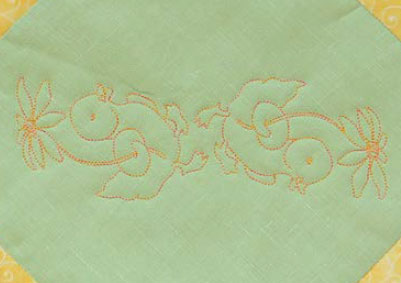
• The motif used for this project was 80132-03. The design was enlarged by 20% two times in embroidery software. Place the hoop on the machine and load the enlarged design. Rotate the design 45 degrees.
• Stitch the design.
• Repeat the process in one more 12″ x 14″ fabric piece.
• Remove excess stabilizer and trim loose threads.
Table Runner Construction
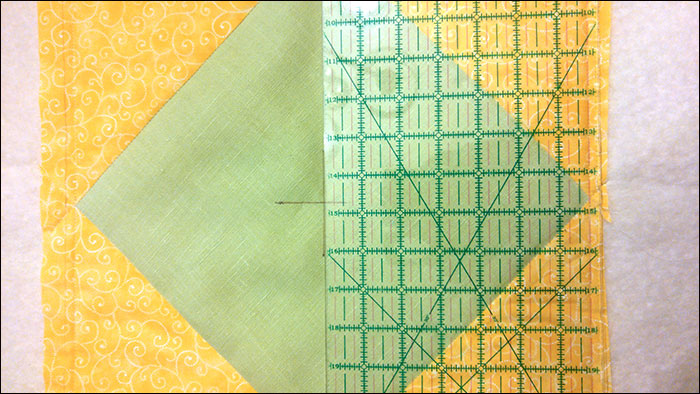
• Centering the designs, trim the rectangles down to a 10½” square with the design on point as shown in illustrations.
• Cut one more 10½” square of center motif fabric.
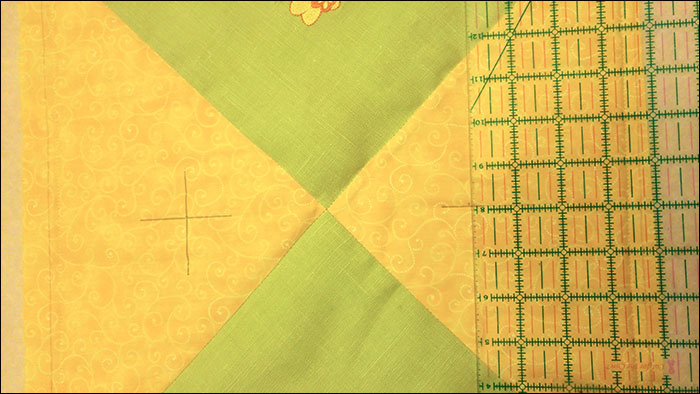
• Lay the squares and triangles out on a flat surface as shown.
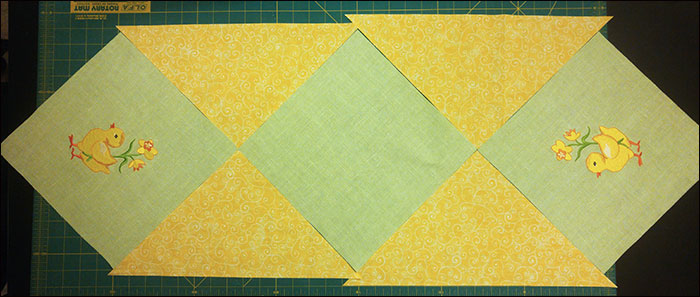
• Pin together diagonal units, as shown, matching seamlines. Be careful not to stretch the sides of the triangles, as they are cut on the bias. The triangle sides will extend beyond the square units on the sides.
• Stitch each unit using 1/4″ seams.

• Press all the seams to one side.
• Pin together the stitched units and stitch together the three units for a completed table runner unit.
• Press all the seams to one side. Place the remainder of the backing and binding fabric face down on a smooth surface. Place the piece of batting on top of the backing piece and follow with the table runner unit face up. Pin all three layers together or use temporary spray adhesive to connect the three layers.
• Stitch in the ditch on all seam lines of the table runner to attach all three layers.
• Use a long ruler and marker to mark the finished edge on both sides. This edge should be 1/4″ outside of the points of the center motifs. When the side edges have been marked, sew all the way around the table runner ¼” inside the finished edge. DO NOT trim off the outside edge yet.
Embroider (Quilt) the Center and Outside Motifs
• Mark the centers of the center motif.
• For the center motif, use design 80132-11. Duplicate the design. Mirror one design left to right and also mirror it top to bottom. Arrange the two designs as pictured.
• Hoop the center square on point using no stabilizer. Adjust bobbin tension for a balanced tension on your machine and stitch the design.
• Mark the center of the side designs.
• Hoop the runner so the mark is in the center of the hoop with no stabilizer.
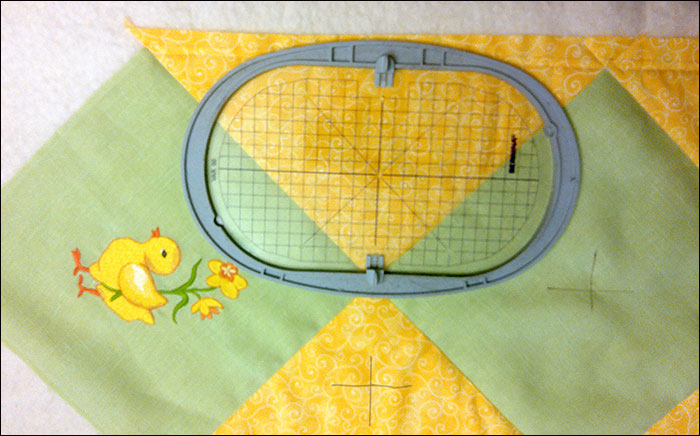
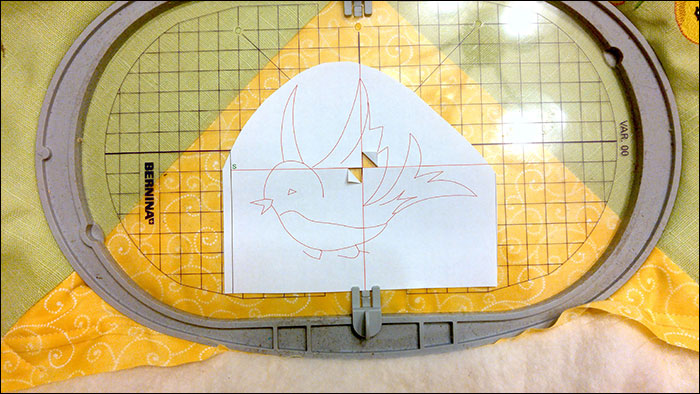
• For the side motifs, the design 80132-12 was used. This design was enlarged by 20% three times in embroidery software. Print a design template. Using the design template, determine the placement of the design, and adjust design position as needed.
• For a symmetrical appearance, mirror two of the birds left to right so they face each other on the finished table runner.
Finishing the Table Runner
• Trim the edges of the table runner as marked previously and bind as desired.
This material is © OESD, LLC and may not be reproduced or published without permission.