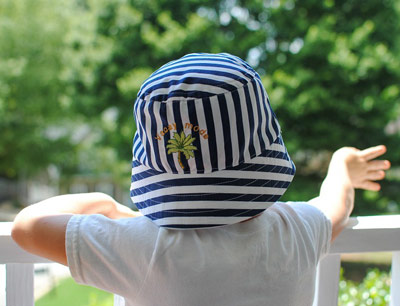
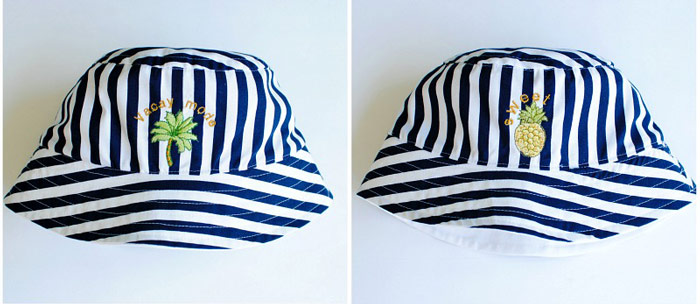
This versatile kid’s bucket hat is a quick and easy summer project using any embroidery design of your choice.
by Laura Pifer, Trash to Couture
As a mother of 3 boys who love to be outdoors, I’ve had my fair share of sewing bucket hats. In the Summer we spend most of our time outside near the water, at various sports, or just playing in the yard. My toddler is at the age where he won’t wear sunglasses so I rely on these hats to protect his face and ears. This is an essential sewing project that you can customize with embroidery and fabric. I like to use Coats & Clark Polyester Embroidery Thread for the embroidery and add their Dual Duty Plus Threads for the topstitching. For the designs, I loved this Baby Minis 2 collection. Perfect for a little one’s summer hat and just the right size! Get the details below and make your own.
Supplies
- 1/2 yd fabric (medium wt. cotton)
- 1/4 yd interfacing (heavy wt. for brim of hat)
- Coats & Clark Polyester Embroidery Thread
- Coats & Clark All-purpose thread (sewing)
- Coats & Clark Dual Duty Plus Thread
- Bias Tape (1/4″ single fold and 1/4″ double fold) or bias tape maker
- Embroidery Designs: #11736 Baby Minis 2
- OESD StabilStick TearAway
- General Sewing/cutting supplies
- Bucket Hat Pattern
Instructions
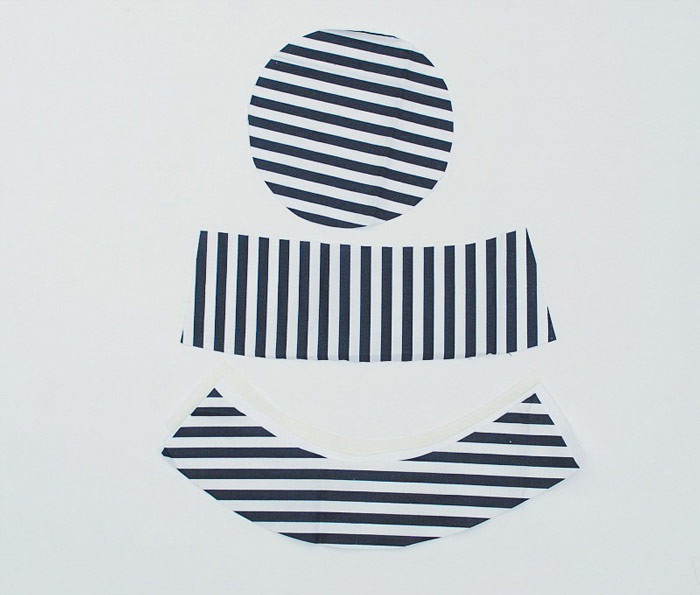
Cut out the pattern. I drafted this simple bucket hat pattern to fit my 3-year-old son. You can use the free pattern or use several found at stores or online. A classic bucket hat is compromised of 3 parts: the crown (top circle), the band, and the brim. The tutorial below will work for most patterns.
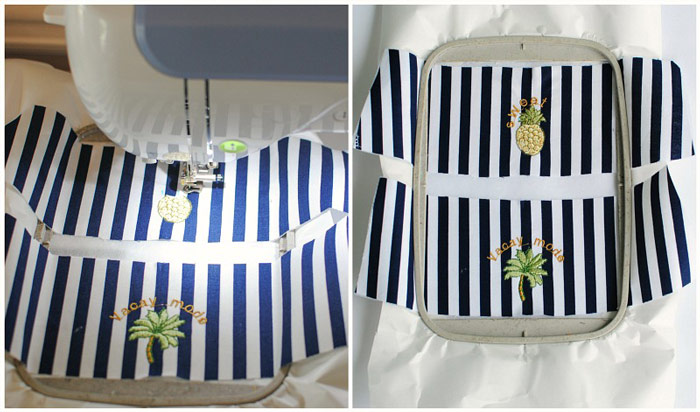
Use an adhesive tear away stabilizer to place the band pieces of the hat on and hoop. Mark the center.
You will want the embroidery to start about 1/2″ from the raw edge. Once the embroidery is complete remove the tear away stabilizer from the back.
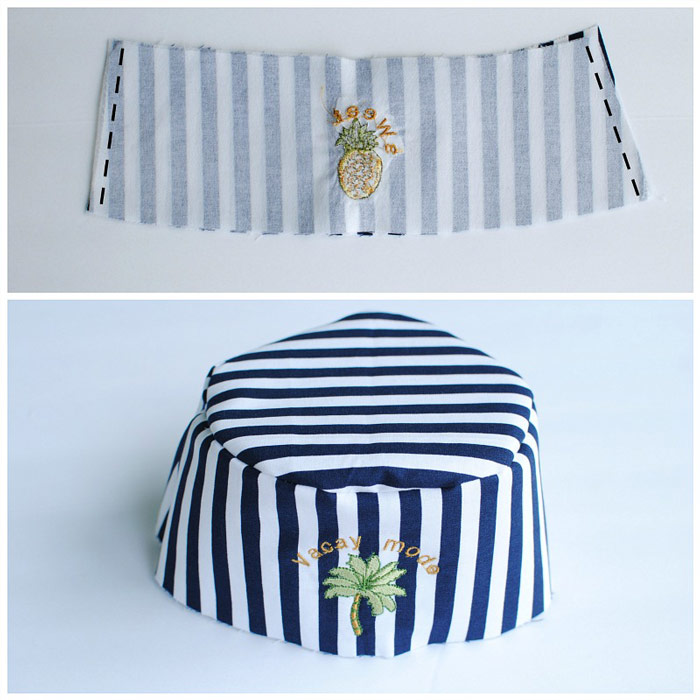
Sew the band pieces together on the sides forming a loop. Use a 1/4″ seams allowance for all sew. Because I’m not doing a liner you can either serge the seam allowance or add bias tape to sew over the seams.
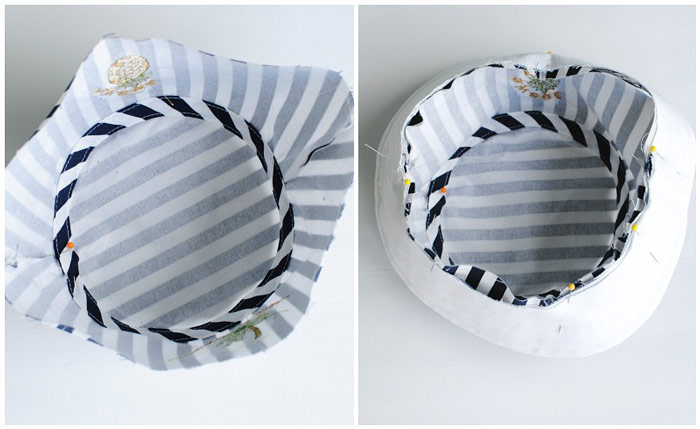
Pin the crown of the hat around the band of the hat right sides together. Keep in mind the direction of the fabric on the top as well. Sew around to form the top of the bucket hat.
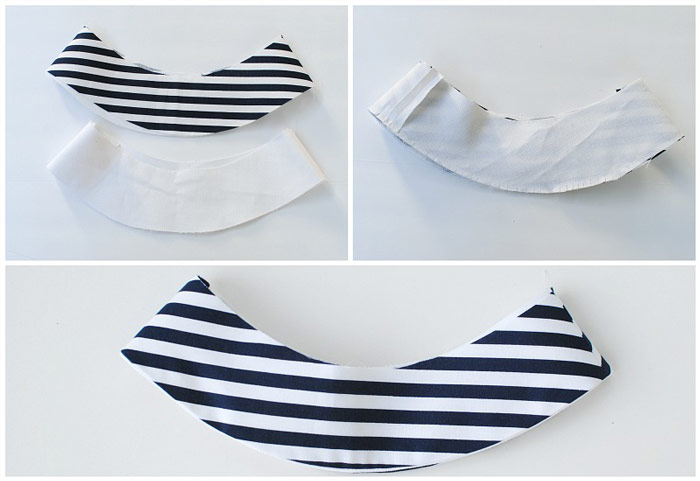
Create the brim of the hat:
Press the interfacing onto the main fabric.
Sew liner and main brim pieces right sides together to create loops.
Pin the liner and main right sides together matching seams.
Sew around the outer edge.
Clip the curved edges.
Flip right side out and press.
For the interior, pin 1/4″ bias tape over the top seam. The seam should be in the center of the bias tape. Evenly sitch both sides of the bias tape.
Pin the brim to the hat (right sides together) and sew around.
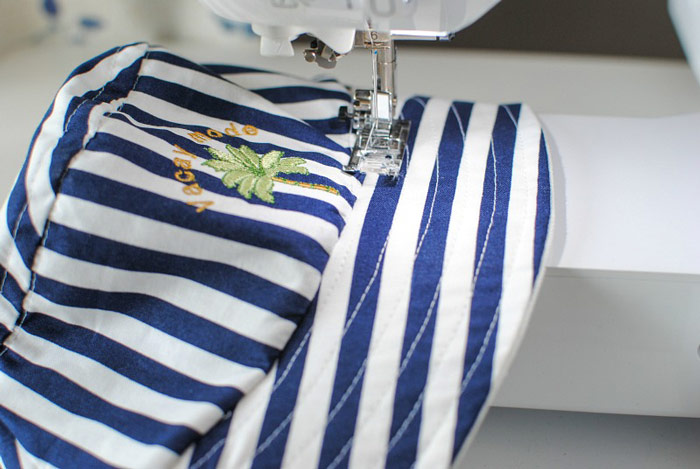
Use double bias tape around the seam allowance. This time you will just sandwich the double bias tape over the seam allowance and sew.

For a topstitching detail, sew around the brim every quarter inch till you reach the crown of the hat.
My little guy loves wearing this…already has some stains from his adventures 🙂

This material is © OESD, LLC and may not be reproduced or published without permission.