by Laura Pifer, Trash to Couture
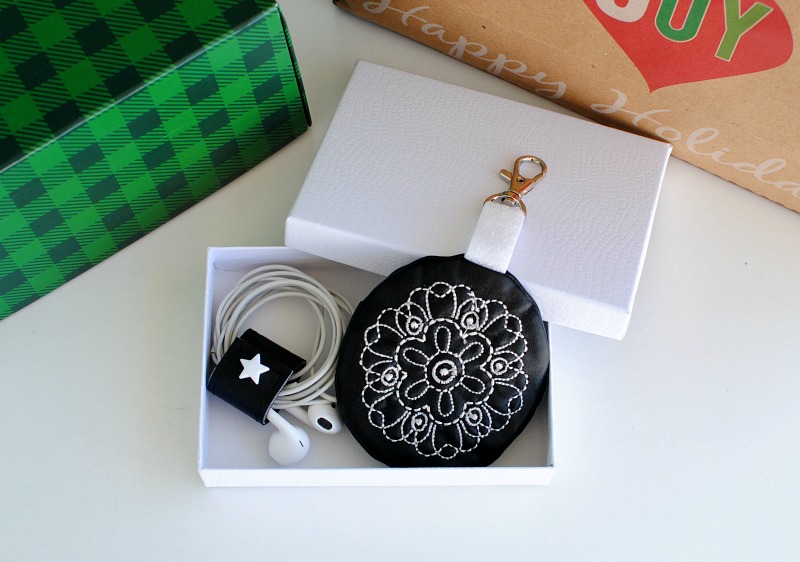
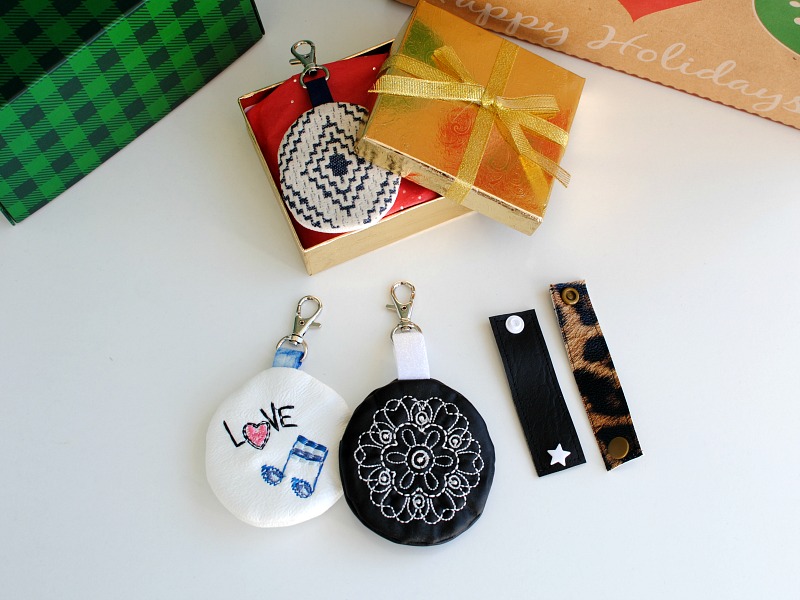
With the holidays upon us, I thought I’d share some simple gift ideas that don’t require a lot of materials (think scraps) and quick to make. Embroidery Online has a lot to offer with their In-The-Hoop projects: from luggage tags, and zipper pouches, to coasters and wallets. You can find a gift for everyone in your life. For Christmas gifts and stocking stuffers I thought this In the Hoop Earbud Case collection was perfect. You can use the embroidery pattern that comes with the collection but also customize and add your own or just use fabric too. Hang these on your gym bag, backpack, wallet, etc. Get the details below and make your own.
Supplies
- OESD’s In The Hoop Earbud Case #19999-032 embroidery collection
- OESD Medium Weight TearAway Stabilizer
- Temporary Spray Adhesive
- 1/2″ or 5/8″ elastic or bias tape
- 1/2″ swivel hooks or D-rings
- Scraps of fabric (I used a faux leather knit that stretched for the back)
Instructions
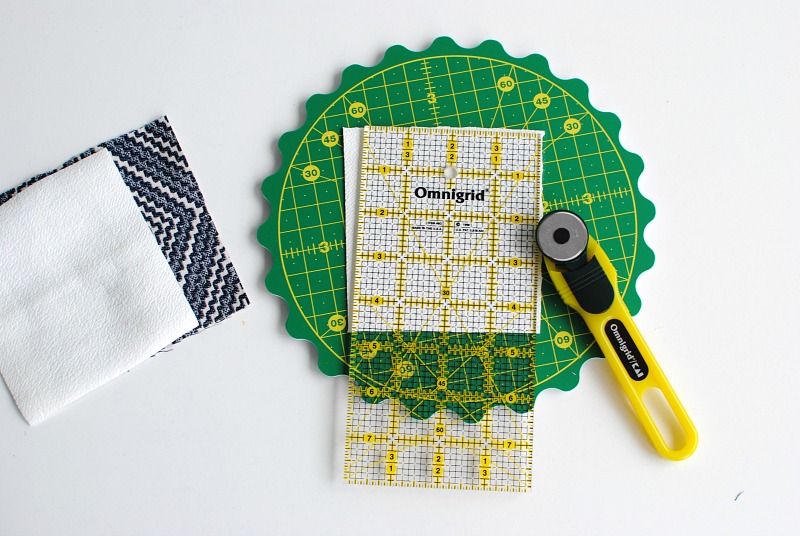
Cut:
- 4″ x 4 1/2″ Main top piece
- (2) 4 1/2″ x 5 1/2″ pieces fabric (fold in half to measure 4 1/2″ x 2 3/4″) (back pieces)
- 3″ piece of ribbon or bias tape
Embroider:
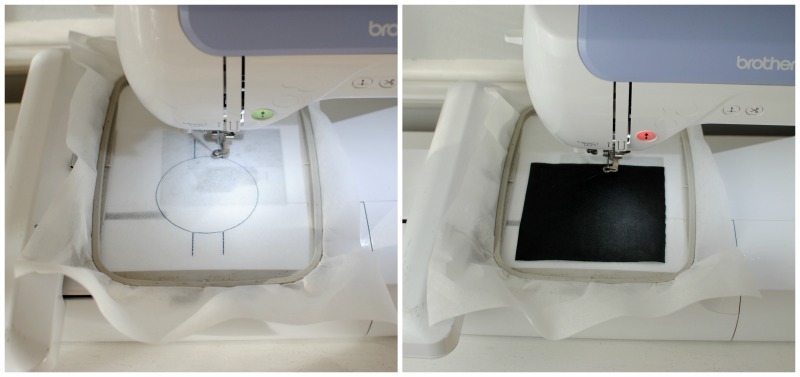
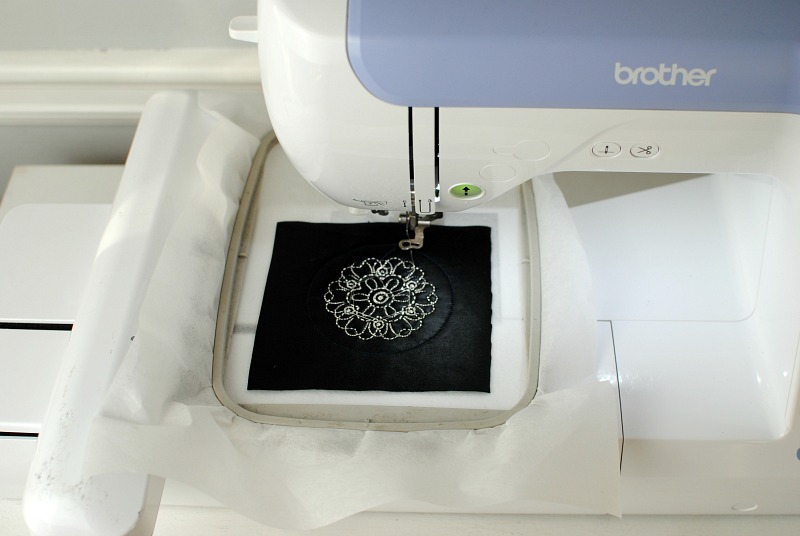
- Hoop one layer of medium weight tear away stabilizer.
- Stitch the Placement Stitch.
- Using temporary spray adhesive, spray the Placement Stitch.
- Center and place the top fabric piece over the Placement Stitch circle
- Stitch the next stitch called Tackdown, using a thread color that matches your fabric.
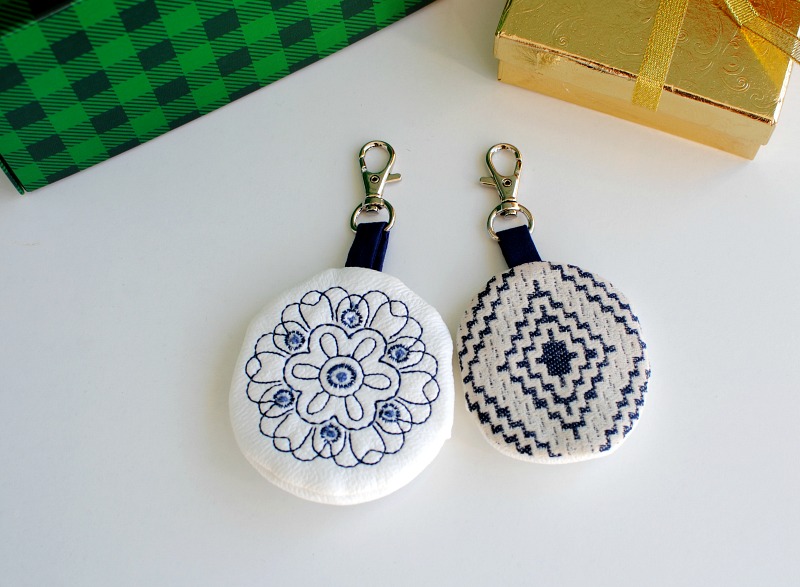
Embroider the center design (make sure to change the thread). You can also use other designs, just place them in the center of the circle. I like the idea of monograms or little designs OESD offers.
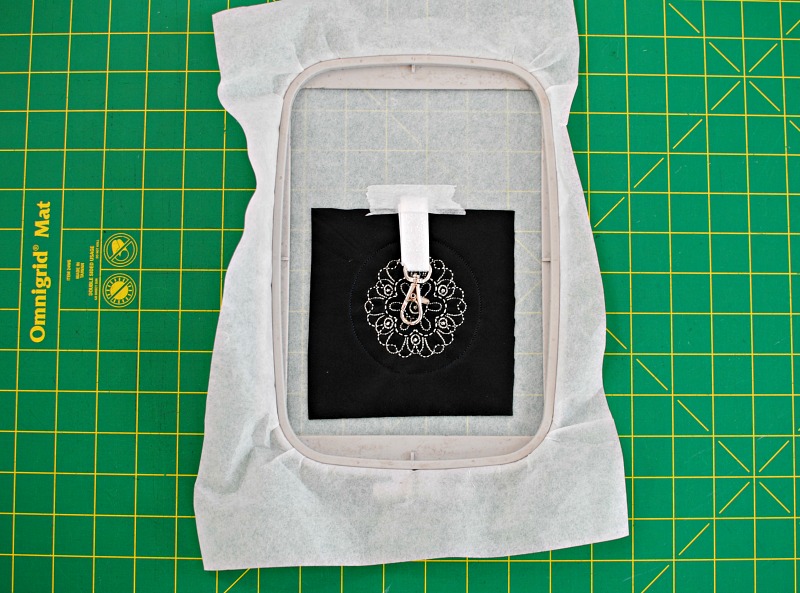
Using the ribbon or trim, fold in half and place the Swivel hook or metal key ring on the ribbon. Place the ribbon in the center of the placement guidelines with raw edges even. I used tape to hold into place.
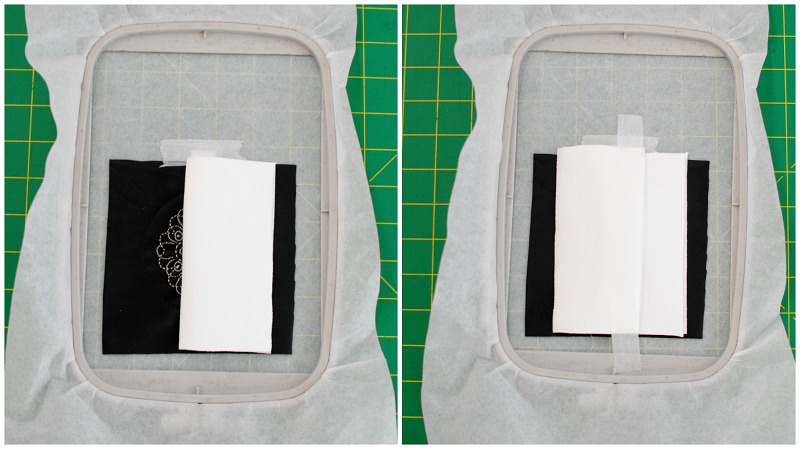
Find the two sets of parallel lines that were stitched during the Placement Stitch, and use them as a guide to place your two folded back pieces so that they are overlapping. Place one back piece on first lining up folded edge with the left placement line and raw edges even. Place the other back piece over the first back piece lining up folded edge with the right placement line and raw edges even.
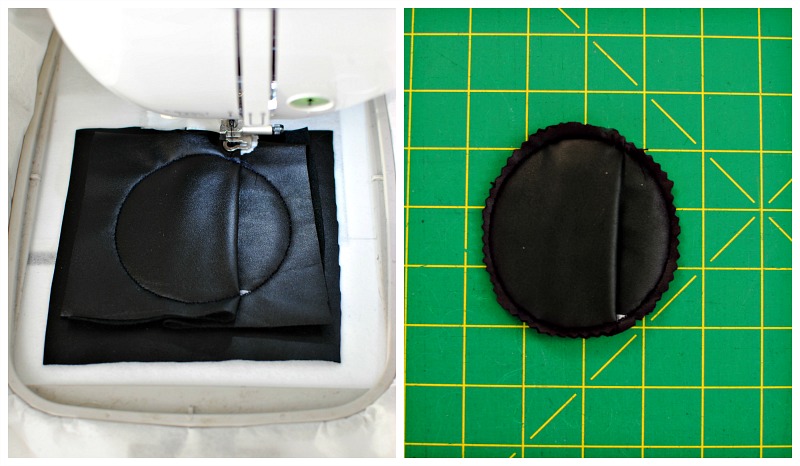
- Stitch the last stitch called Seam Stitch. Watch so the embroidery foot doesn’t get caught on the folded back pieces.
- Use pinking sheers to cut the extra fabric close to the stitching line.
- Turn right side out and push corners out.
Now go make 20 more! I love these for stocking stuffers or gift exchange ideas. You can add some little gifts inside too (new headphones/earbud set/etc).
This material is © OESD, LLC and may not be reproduced or published without permission.