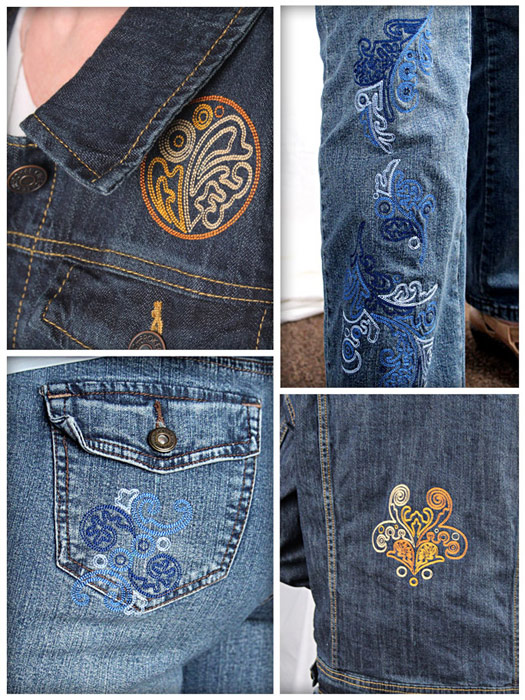
OESD’s embroidery collection Chic Embellishments #12528 is a fabulous group of designs for embellishing anything denim. Other fabrics could be used also; however, the collection boasts and dances on denim. The designs could be stitched in the beautiful brown colors called for in the collection or change the color to different shades of blues for a more subtle look. Whatever your choice, it will look good. Tips for embroidering on denim and pre-made garments are included. Have fun embellishing your wardrobe!
Supplies
- OESD’s Chic Embellishments #12528
- OESD Polymesh CutAway stabilizer
- OESD StabilStick CutAway stabilizer
- Isacord embroidery thread
- OESD Bobbin Thread
- Ballpoint titanium embroidery needle #80
- Marking pen
- Double-sided fabric tape
- Temporary spray adhesive
- Denim jean jacket and jeans
Instructions
Embroidery on Denim
Note: Denim is a stretchy weave fabric and therefore it is recommended to use a cut away stabilizer. Some denim also has spandex in it which makes it stretchier so again a cut away is used for the best results. For denim with spandex in it, the ballpoint embroidery needle produces the better results.
Denim Jean Jacket
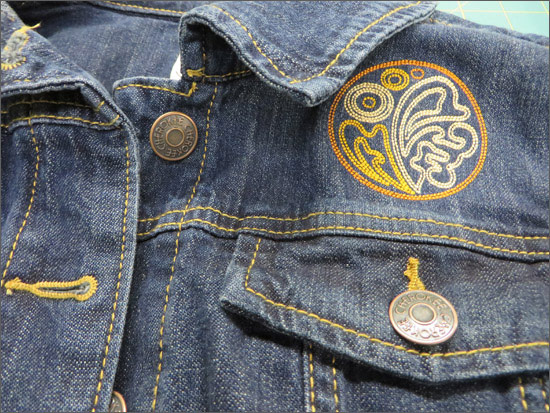
Note: The following designs were used to stitch on the jean jacket: #12528-11 for the center back and #12528-15 for the left upper front. Print paper template of each of the designs for perfect placement. The original colors of thread called for in the designs were also used.
• Using the paper template for the center back design as a guide, mark the center of the back of the denim jacket.
• Cut two pieces of mesh cut away stabilizer for the size of hoop needed. Using temporary spray adhesive, spray between two layers of stabilizer and adhere to each other and to the wrong side of the jacket. Place double sided fabric tape on the wrong side of the inner hoop. Using template in inner hoop, position onto center mark on jacket, and hoop. Place hoop on embroidery machine and find center point. Embroider design.
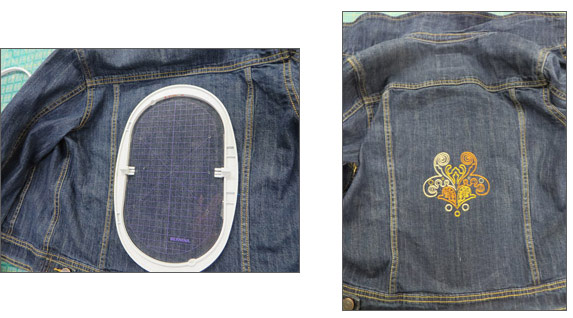
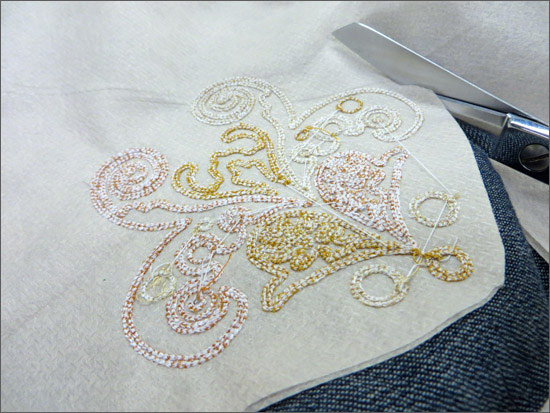
• Remove from hoop and trim stabilizer.
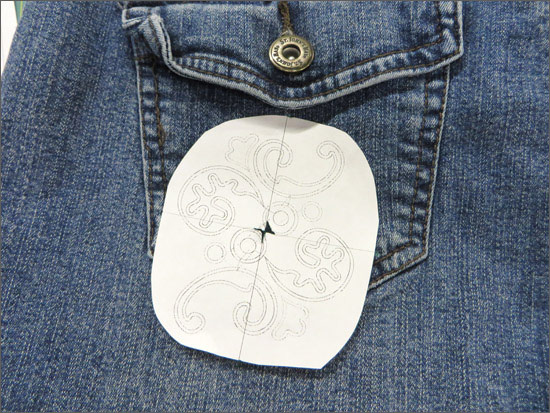
• Using the paper template for the left upper front design as a guide, mark the center of the upper left front of the denim jacket.
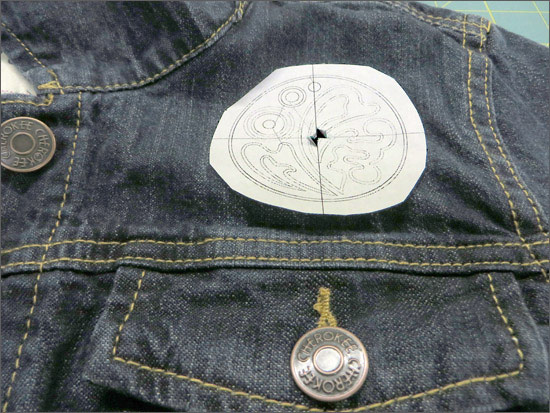
• Cut a piece of sticky back cut away stabilizer for the size of hoop needed. Hoop the piece of stabilizer with the paper face up in the hoop. With the plastic template in the hoop, mark the stabilizer. Turn the hoop over to the back and transfer the marking onto the back of the stabilizer. NOTE: The paper backing will be removed and the markings will also unless you mark on the back also. Remove paper backing from the front by scoring the back and peeling it away. The markings from the back can now be marked on the sticky top.

• Place the center point of the jacket onto the center point of the sticky stabilizer using a straight pin. Line up the remaining marks so that the design is not skewed.
• Place hoop on embroidery machine and find center point. Embroider design.
• Remove from hoop. Trim stabilizer.
Denim Jeans
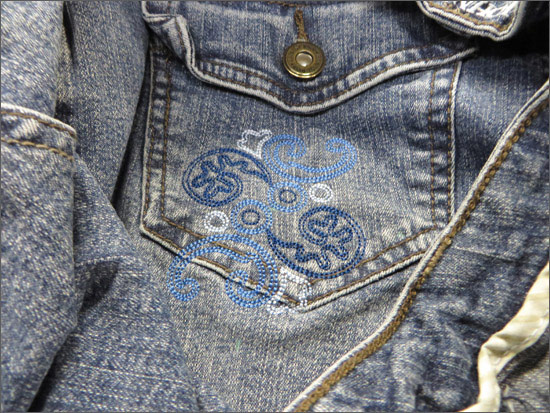
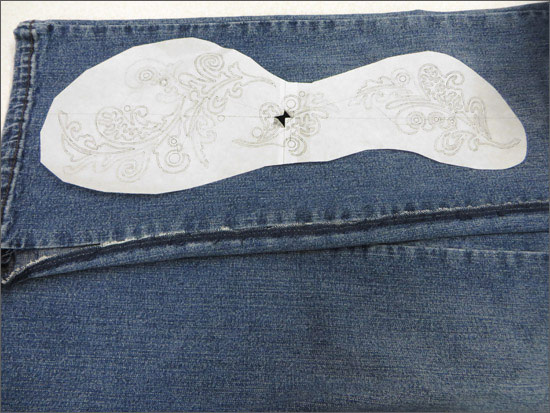
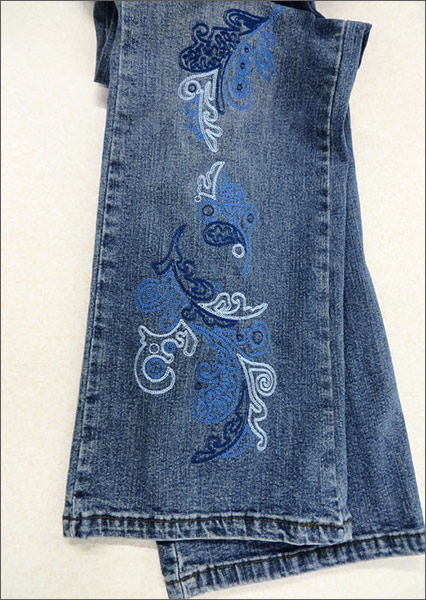
Note: The following designs were used to stitch on the denim jeans: #12528-01, #12528-03 and #12528-04 for the jeans leg in the maxi hoop and #12528-20 was duplicated, mirror horizontal and mirror vertical for the back pocket design. Paper templates were printed for the designs for perfect placement. The colors used for the designs were shades of blue. (Isacord 3644, 3620 and 3652).
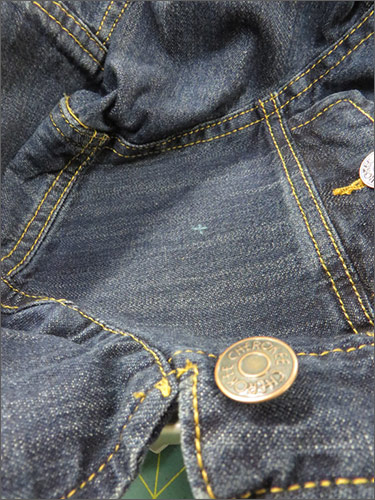
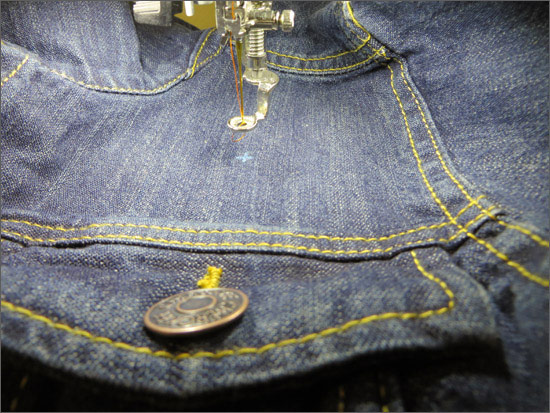
• Using the paper template for the back pocket design as a guide, mark the center of the pocket of the jeans.
• Cut a piece of sticky back cut away stabilizer for the size of hoop needed. Hoop the piece of stabilizer with the paper face up in the hoop. With the plastic template in the hoop, mark the stabilizer. Turn the hoop over to the back and transfer the marking onto the back of the stabilizer. NOTE: The paper backing will be removed and the markings will also unless you mark on the back also. Remove paper backing from the front by scoring the back and peeling it away. The markings from the back can now be marked on the sticky top.
• Turn the jeans inside out and place the center point of the pocket onto the center point of the sticky stabilizer using a straight pin. Line up the remaining marks so that the design is not skewed.

• Place hoop on embroidery machine and find center point. Embroider design.
• Remove from hoop. Trim stabilizer.
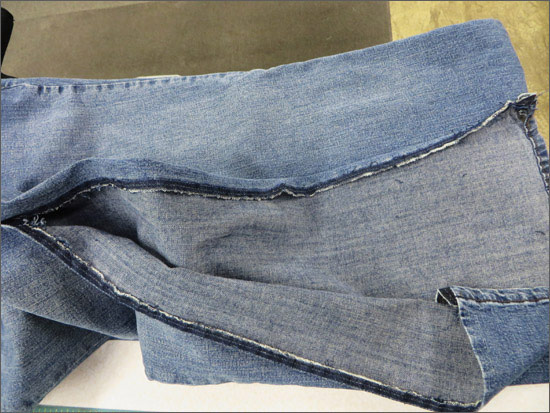
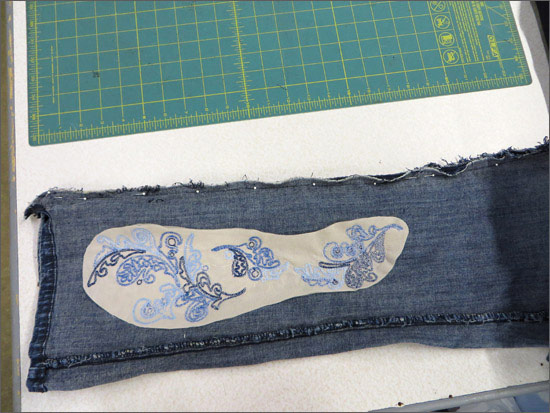
• To stitch a design down the leg of a pair of jeans, the inside leg seam needs to be ripped out. Turn jeans leg inside out and with seam ripper, rip out the majority of the inside leg seam so that the fabric lies flat to be put into the embroidery hoop.
• Using the paper template for the jeans leg design as a guide, mark the center of the jeans leg.
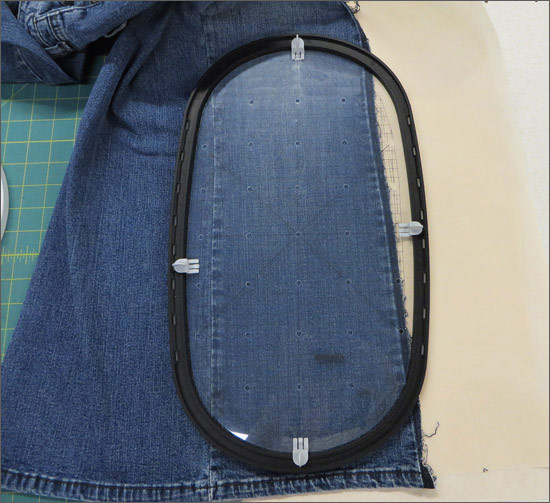
• Cut two pieces of mesh cut away stabilizer for the size of hoop needed. Using temporary spray adhesive, spray between two layers of stabilizer and adhere to each other and to the wrong side of the jeans leg. Note: If you are using a larger hoop for your designs, you may need to let the stabilizer extend out from the jeans leg on the side and bottom. Place double sided fabric tape on the wrong side of the inner hoop. Using template in inner hoop, position onto center mark on jeans leg, and hoop. Place hoop on embroidery machine and find center point. Embroider design.

• Remove from hoop and trim stabilizer. Leave jeans inside out.
• Now we are ready to stitch the jeans leg back up. Right sides together, pin the raw edges of the leg seam together. Note: I usually can see where the previous stitch was and try to pin along that same line.
• Stitch with same color of thread as possible as the previous thread color. Zigzag or serge the raw edges together. Press seam to one side.
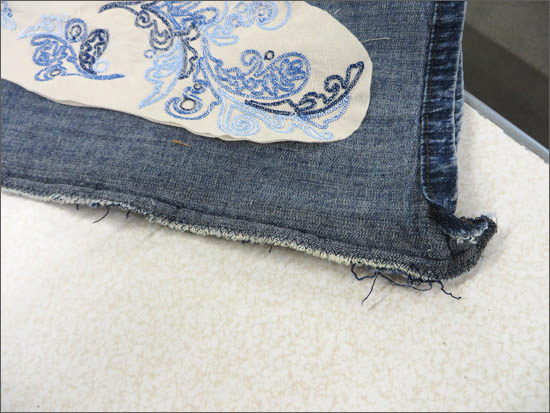
• Fold up the hem and press. With same color of thread as possible and a lengthened triple stitch, stitch the hem. Turn right side out. Now your jeans are ready to wear!
This material is © OESD, LLC and may not be reproduced or published without permission.