by Emily Ramsey
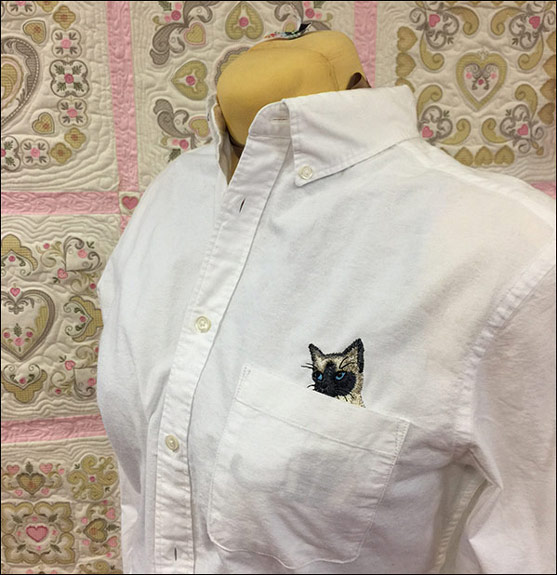
Cats are one of the hottest pets in the world right now. Humans started keeping cats as pets in the Victorian Era and we haven’t looked back. Cat photos and information make up 15% of the entire internet! In honor of our feline friends, we need to dress up that plain white shirt that you never wear with a cat in a pocket. Only part of your kitty will peek out of your pocket – while the rest will stay nice and cozy inside!
Supplies
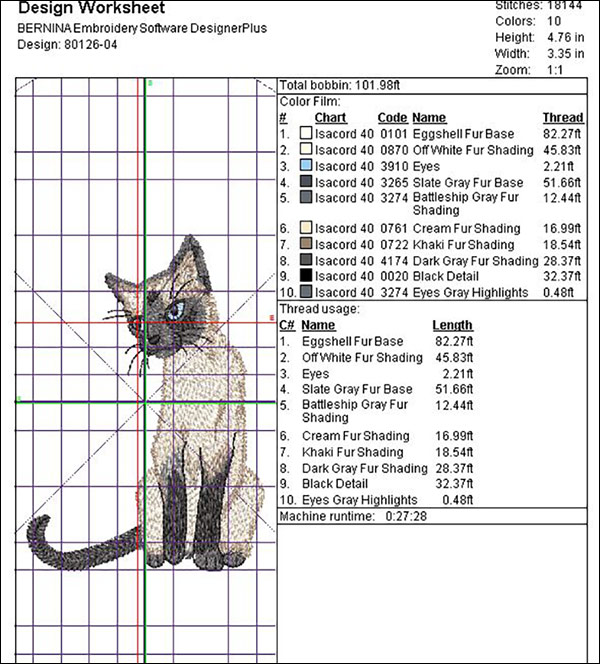
- OESD’s Caturdays by Mo’s Art Design Studio #80126 embroidery collection
- OESD Heavy Weight TearAway Stabilizer
- 505 Temporary Spray Adhesive
- Isacord thread colors for design
- Erasable marking pens
- Hoop with an embroidery field of at least 5 x 6 inches
- Placement Template for hoop
- Embroidery Software for printing template of design
Instructions
1) Pick your design! I picked design #4, the Siamese because he’s super cute – and also, I think he would look very nice in a pocket.
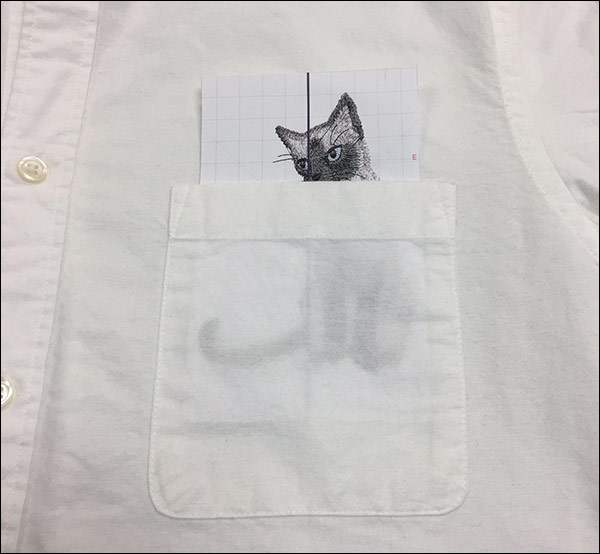
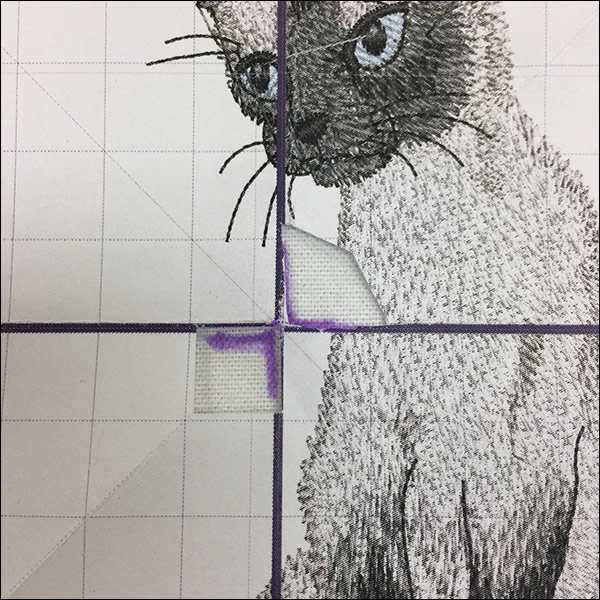
2) Audition the design! This is a step a lot of people skip to save time, and it really helps get the most out of your embroidery. By printing out the design and placing it on the piece you are embroidering you will know exactly what the finished product is going to look like. Good placement is most of the skill of machine embroidery.
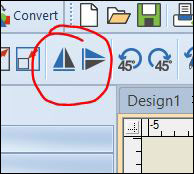
3) Embroidery usually goes on the left side of a shirt. Therefore, I am going to mirror image the cat in my software (which you can also do on most machines), so that the cat is facing middle of the shirt and not the left arm.
4) Open the design in your software. Go to Print. Print the design at 100% no skewing, with center mark options enabled.
Once printed, cut a slit in the vertical and horizontal center of the printout. This will help you mark the design in the right place when you are done auditioning it.

5) Use the printed template to decide your design placement. Consider how much of your kitty you want peeking out of your pocket.
6) Mark the design center with your favorite erasable marker or chalk. *Use per manufacturer instructions and always test marking pens on an area of the garment that isn’t visible before using.
7) If you do not have software, trace the shape of the pocket on the shirt and mark the center top of the pocket before you remove it. This way you can place your cat using the placement tools on your machine, while seeing how the design will fit in the pocket. See the instructions in your manual on design placement for information on how to do this.
8) Remove the pocket with your favorite seam ripper. (Don’t be sad pocket! We will sew you back on!)
9) Gather all the threads you will be using and put them in order. Just like prepping all your ingredients when cooking, this will save you a lot of time while stitching.
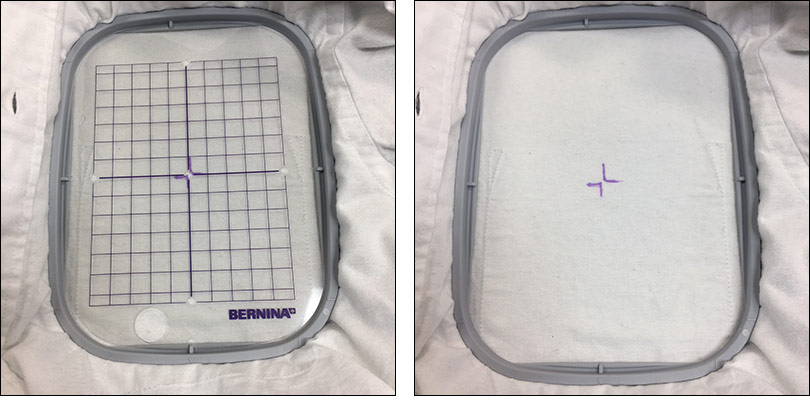
10) Hoop your stabilizer. I am using two layers of OESD Heavy Weight Tear Away. I want to tear it away, and I need two layers for stability with the density of this design.
11) Use temporary adhesive spray to hold the layers of stabilizers together, and to hold the shirt to the stabilizer.
12) Use your hoop template while hooping to get your center makings centered properly.
13) Now we take the hoop to the machine and stitch out our design!
14) After the embroidery is complete, tear away the stabilizer and stitch the pocket back on the shirt using matching thread.

15) Et Voila! Now you have a new fun shirt with your favorite animal in the pocket ready to go with you on your daily adventures!
This material is © OESD, LLC and may not be reproduced or published without permission.