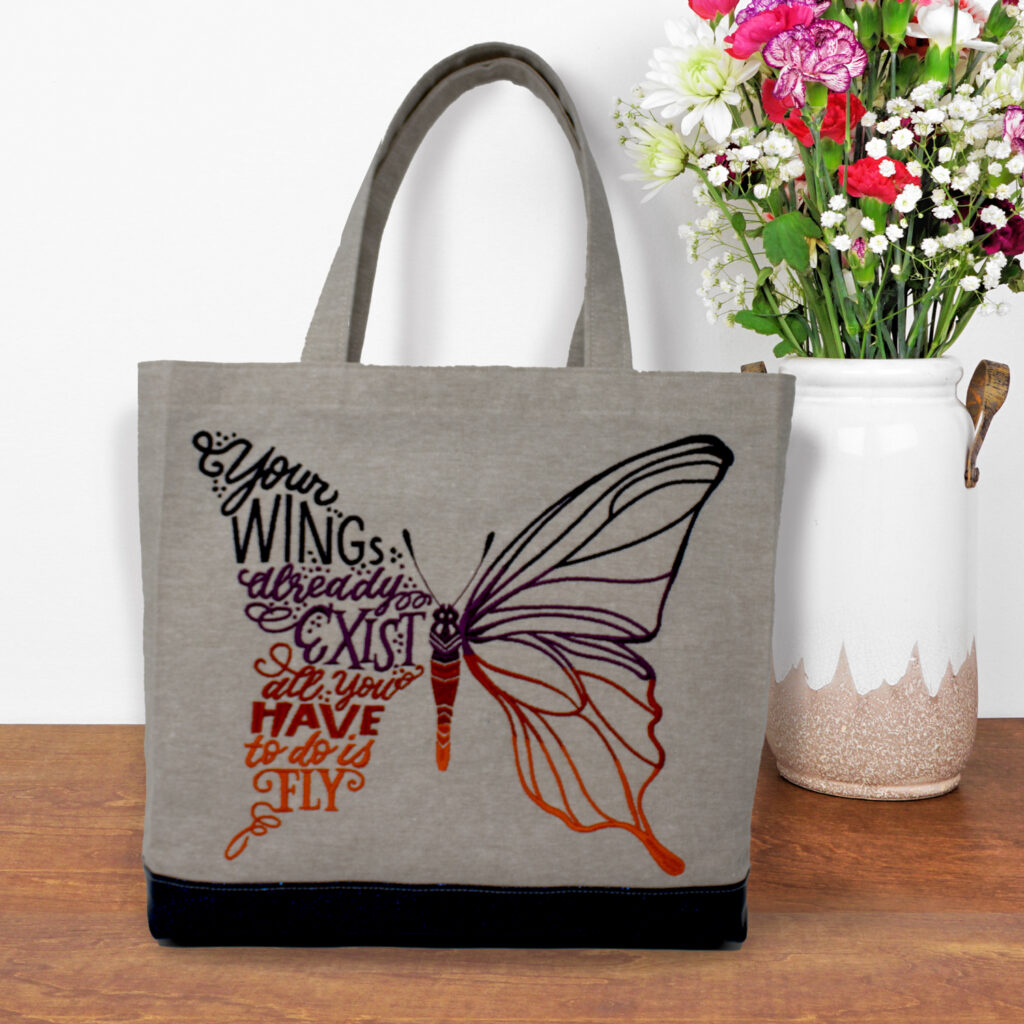
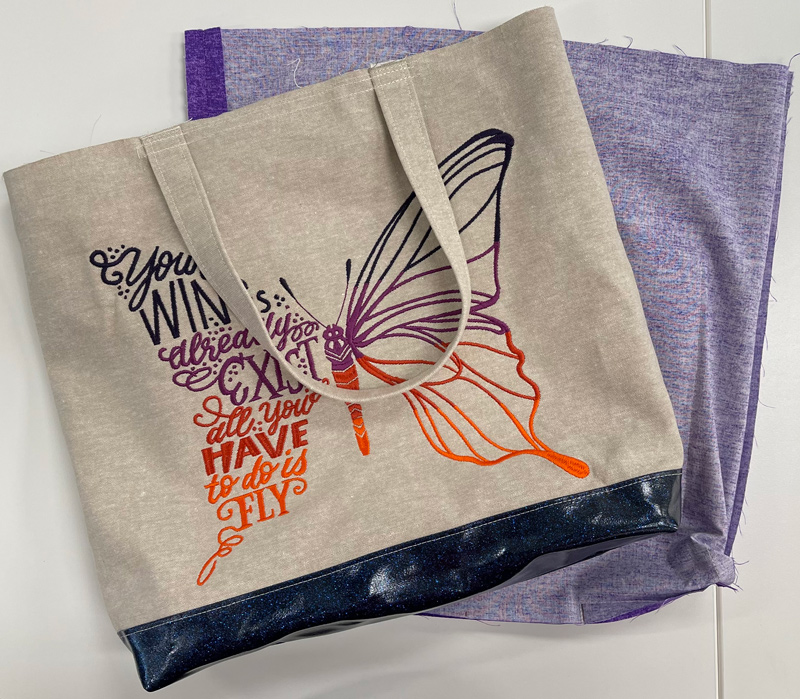
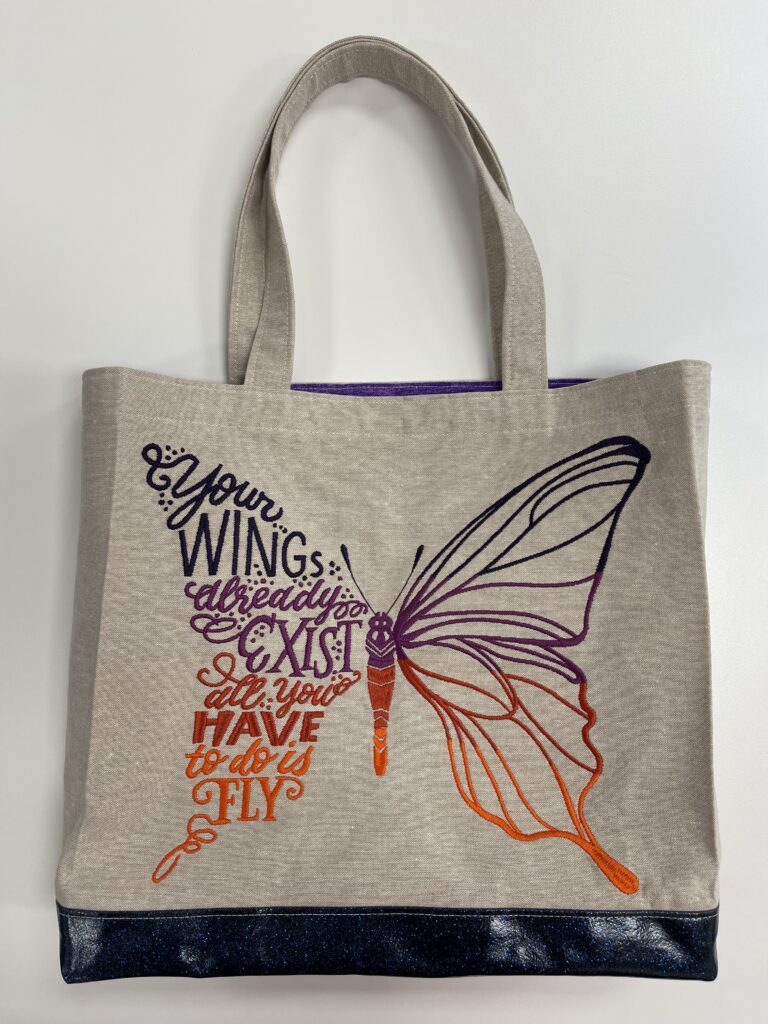
This stylish tote bag, featuring our Butterfly Wings machine embroidery design, is perfect for carrying your essentials! In this tutorial, we will walk you through the steps to stitch your own tote bag from scratch. With just a few embroidery supplies and some time to sew, you can create this unique and beautiful project in no time. So grab your sewing supplies and let’s get started!
Supplies:
- Butterfly Wings PK50007-01L
- OESD Fusible Woven – 20″ Roll
- OESD HeavyWeight TearAway
- OESD Luxe Sparkle Vinyl – Midnight
- OESD Grippy Grid
- OESD Perfect Embroidery Press Cloth
- OESD Expert Point & Press Tool
- Isacord Embroidery Thread for PK50007-01L
- Neutral Thread Color
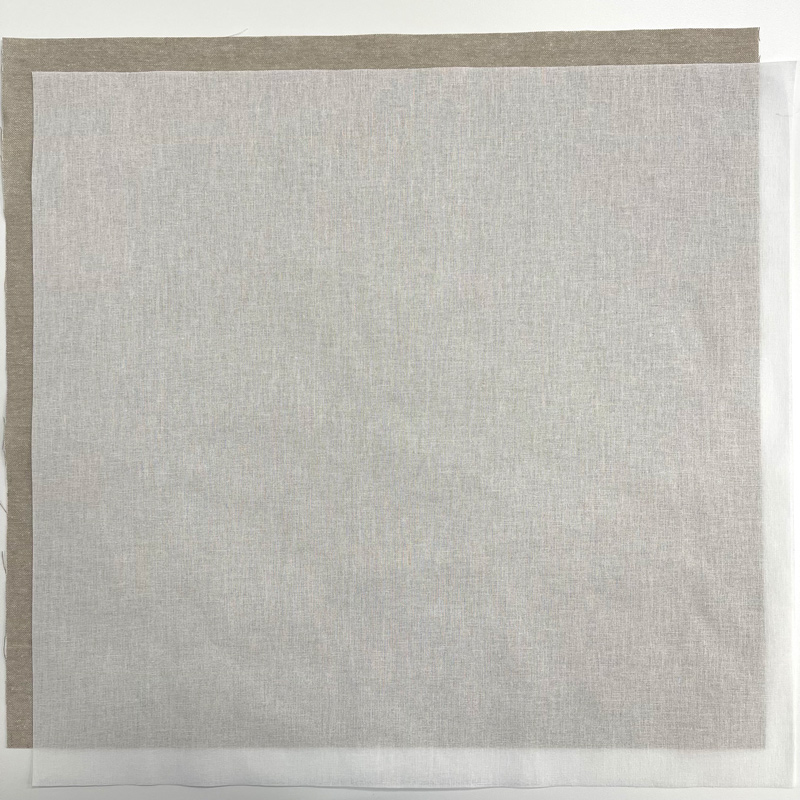
- 3/4 yard Exterior Fabric (we used linen)
- 1/2 yard lining fabric
- 1/2 yard or a fat quarter for lining pocket
Cutting:
Outside & Straps
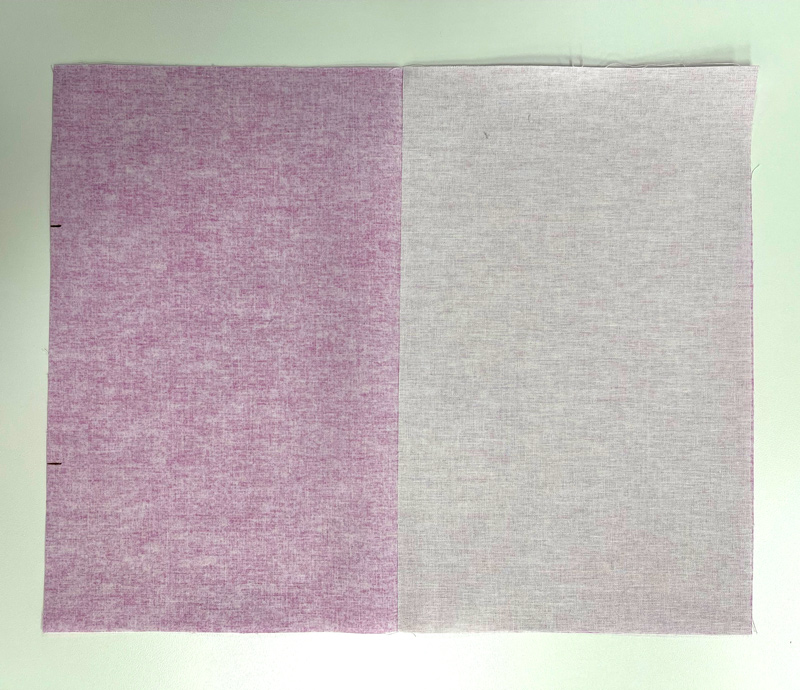
- 1- 17″ x 18″ rectangle
- 1- 15½” x 17″ rectangle
- 2- 4″ x 20″ rectangles
Vinyl 2- 4″ x 17″ rectangles
Lining 2- 15½” x 17″ rectangles
Lining Pocket 1- 12″ x 15″ rectangle
HeavyWeight TearAway – cut 2 hoopings to fit your embroidery hoop for the Butterfly Wings design
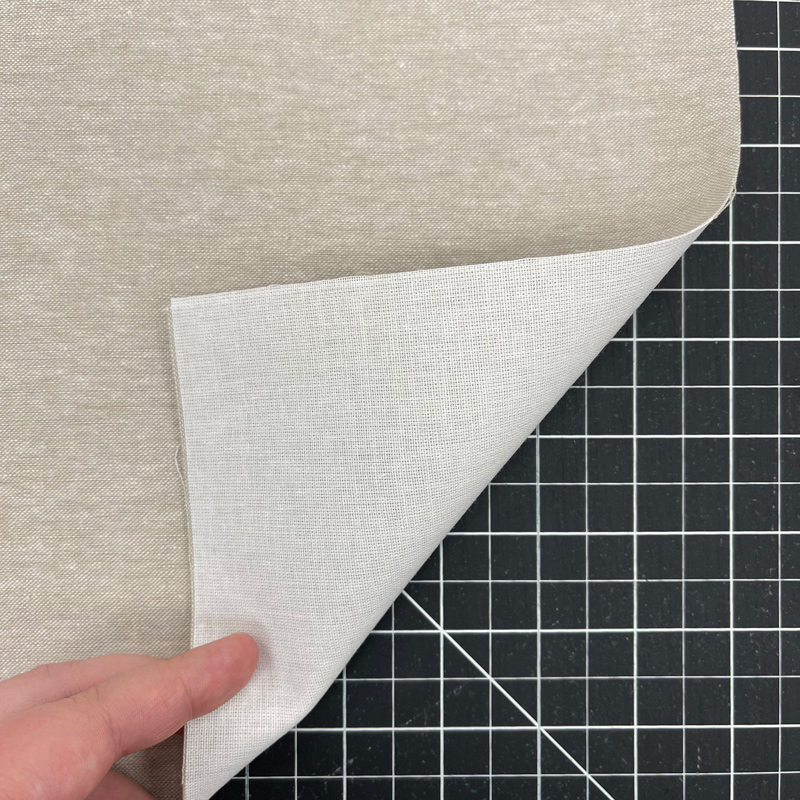
Fusible Woven
- 1- 17″ x 18″ rectangle
- 1- 15½” x 17″ rectangle
- 1- 7½” x 12″ rectangle
- 2- 4″ x 20″ rectangles
Embroidering the Bag Front:
Step 1
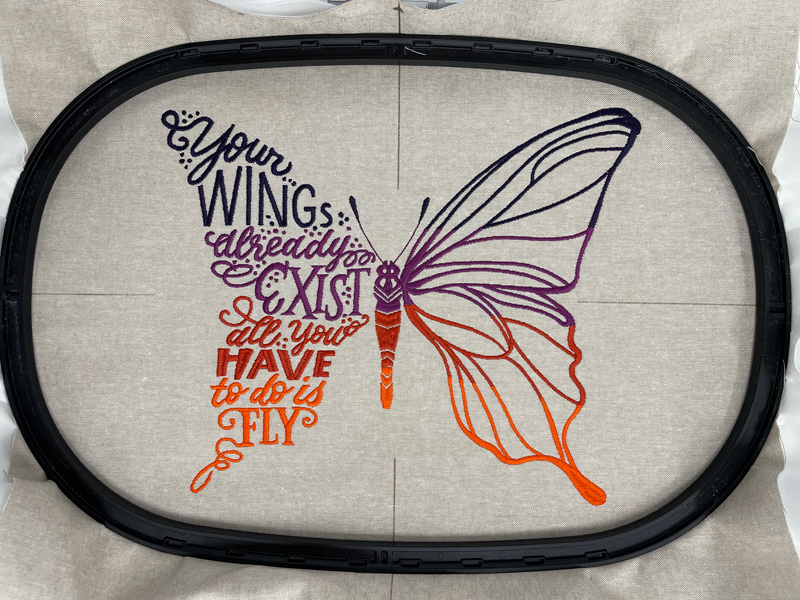
Gather the 17” x 18” outer front rectangle, the 17” x 18” fusible woven rectangle, and the threads for the Butterfly Wings design.
Step 2
Prepare the 17” x 18” outer front rectangle by fusing the fusible woven rectangle to the back of the fabric.
Step 3
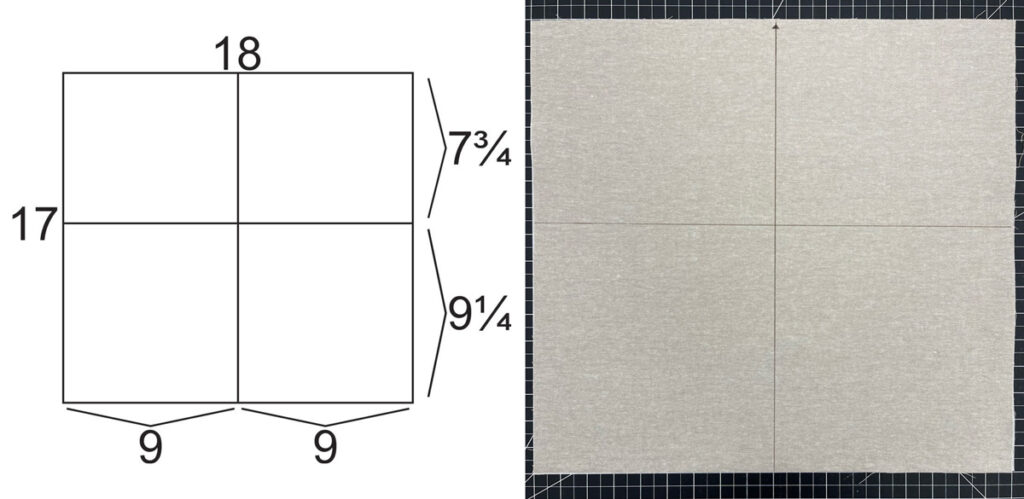
Mark the center placement of the design. The center of the design will be centered on the 18” width and 9¼” from the bottom 7¾ ” from the top. See the diagram. It helps to mark the top of the rectangle.
Step 4
Hoop the background square with 2 layers of Heavy Weight TearAway, centering the center crosshairs. The top of the design will be on the left side of the hoop. The Grippy Grid mat makes this easy!
Step 5
Embroider the Butterfly Wings design following the thread chart.
Step 6
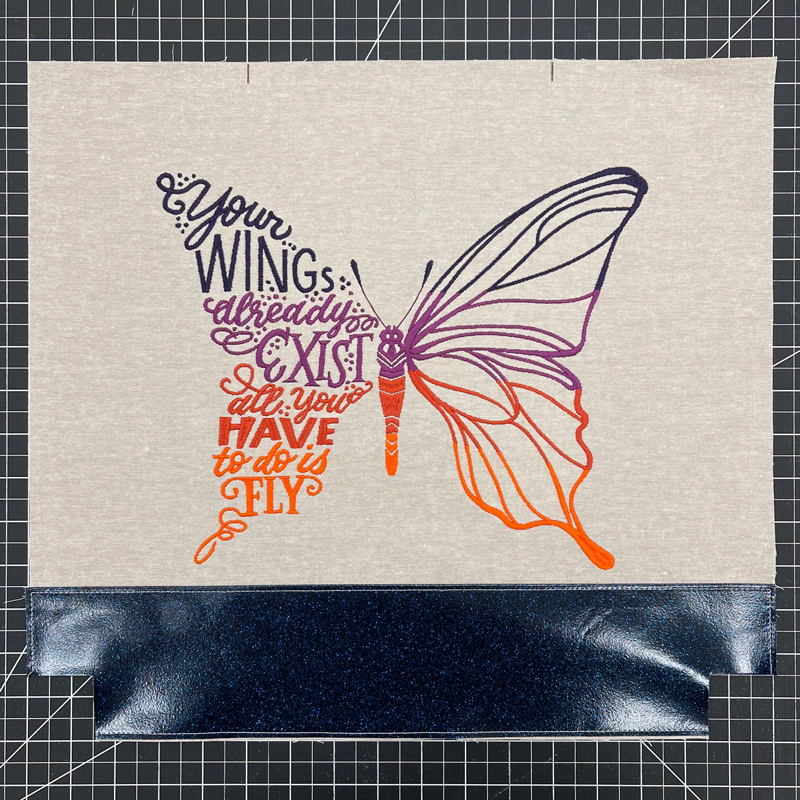
After it is embroidered, remove the fabric from the hoop and remove the bulk of the stabilizer. I left the stabilizer in the middle of the butterfly. It’s okay to leave a little stabilizer in the design. Press the design right side down with a Perfect Embroidery Press Cloth.
Step 7
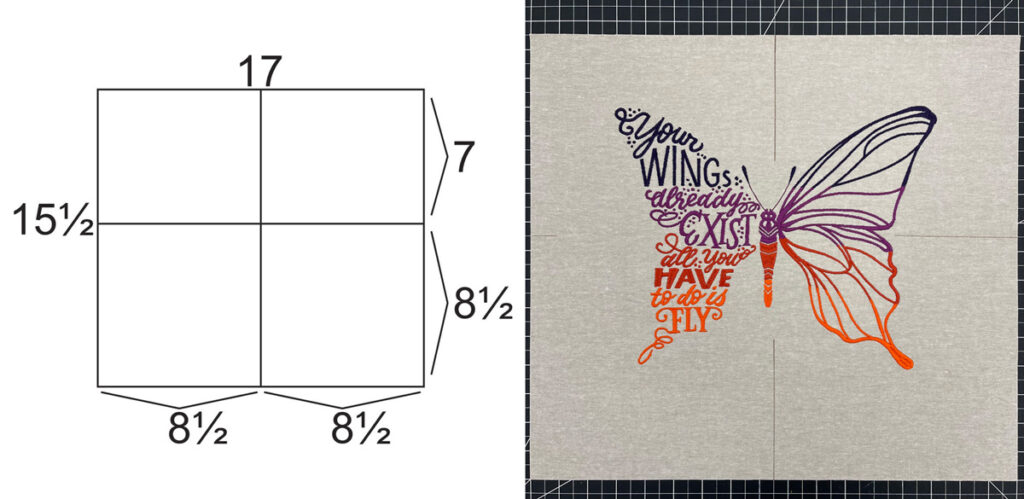
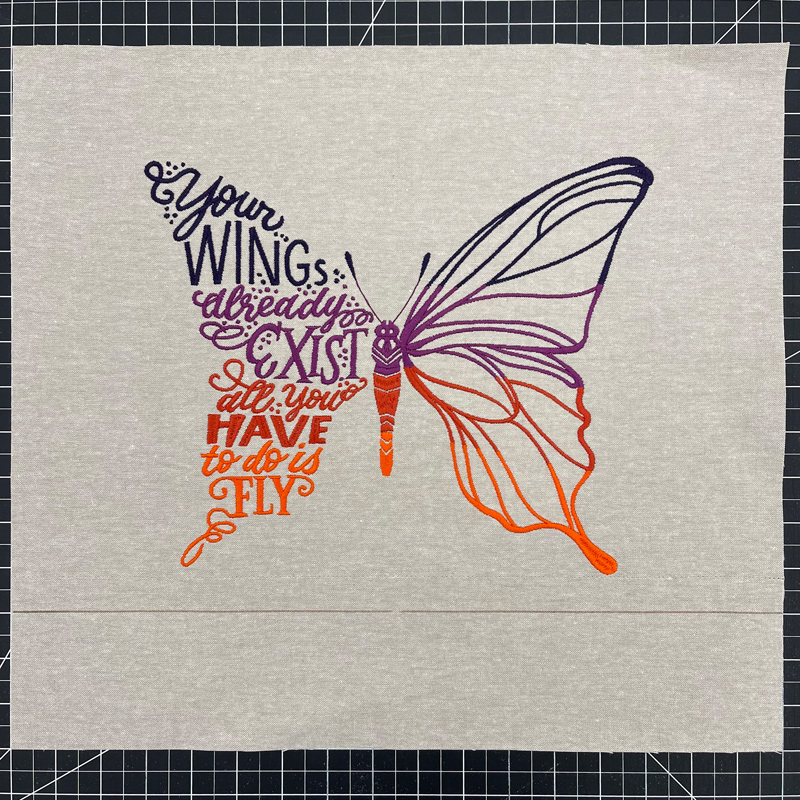
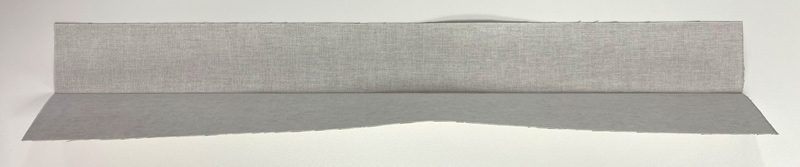
Trim the embroidered fabric to a 15½” by 17” rectangle. See the diagram. From the vertical center of the design, cut 8 ½” on each side. From the horizontal line, cut 7″ above and 8 ½” below
Attaching the Vinyl Bottom:
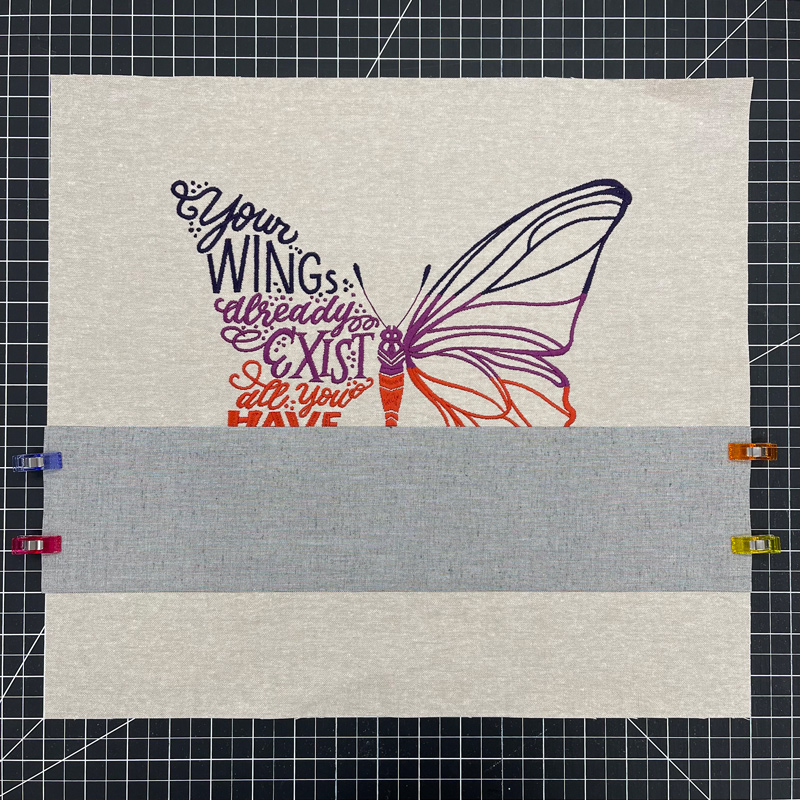
Step 8
Gather the 2, 15½” by 17” outer rectangles (1 is embroidered), the 1, 15½” x 17” fusible woven and the 2, 4” x 17” vinyl rectangles.

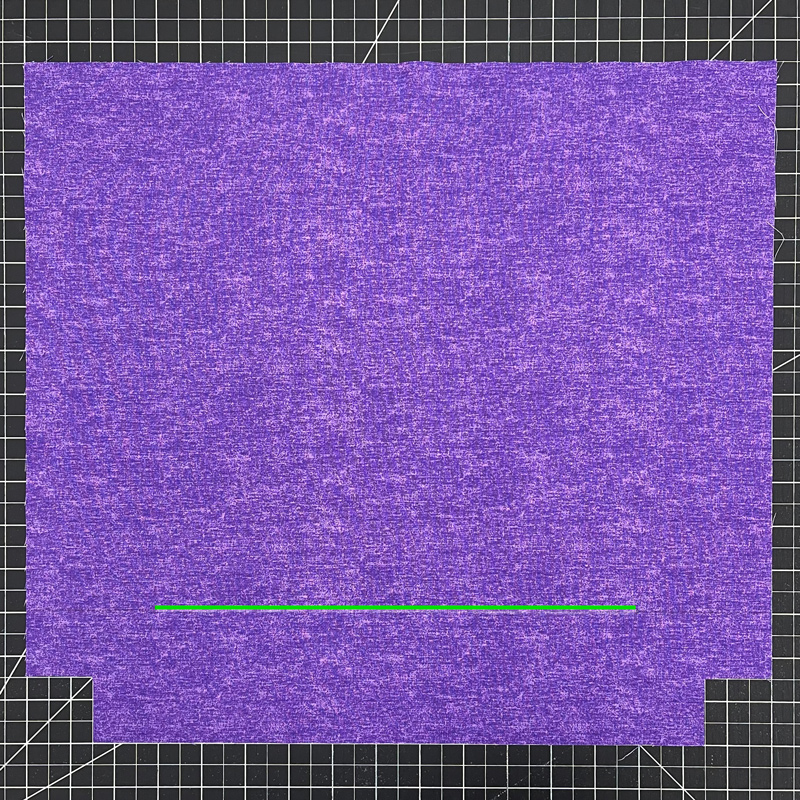
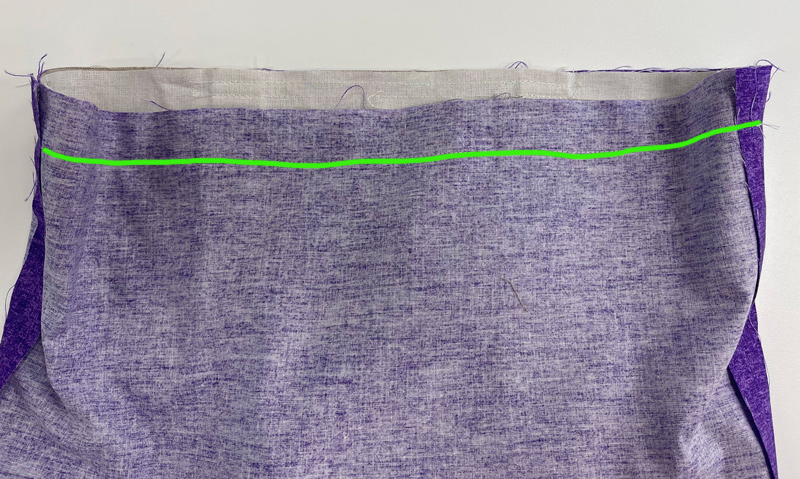
Step 9
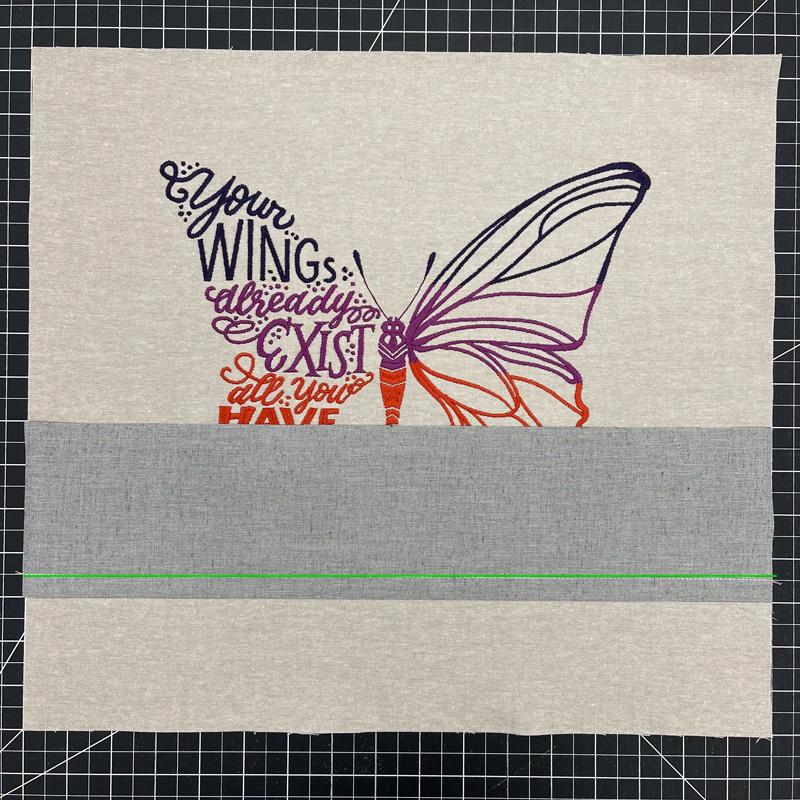
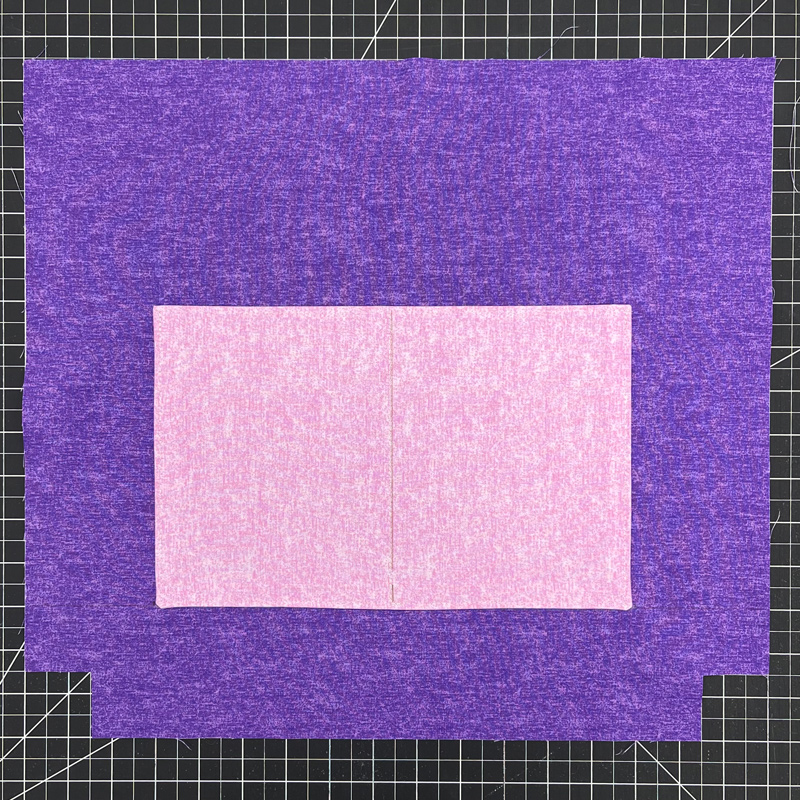
Fuse the fusible woven rectangle to the outer rectangle that does not have embroidery. On the right side of one of the outer rectangles, measure and mark a line 3” up from the bottom.
Step 10
Place the vinyl wrong side down with the long edge aligned with the line and the short ends lined up with the edges of the outer rectangle. The vinyl will be above the line.
Step 11
Stitch the vinyl ½” from the edge aligned with the drawn line.
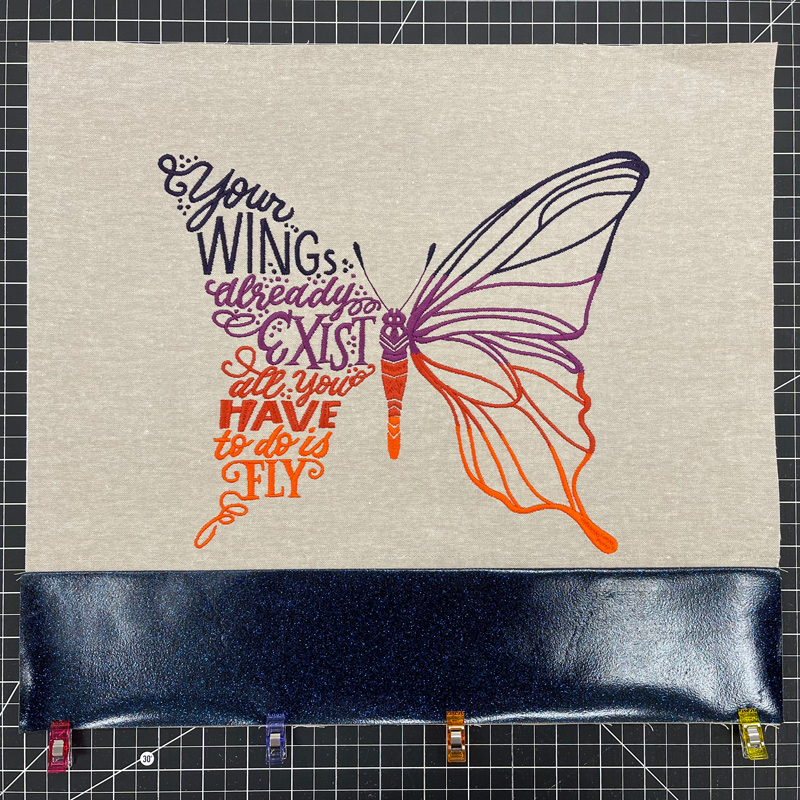
Step 12
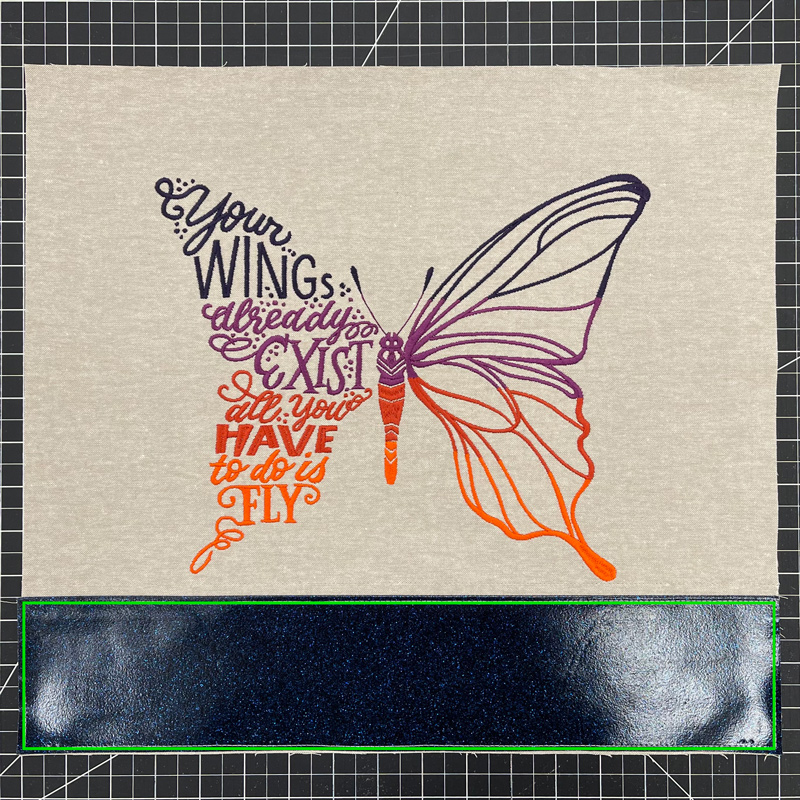
Warm up the vinyl with a medium heat iron and finger press the vinyl down towards the bottom of the bag. Use clips to hold it in place.
Step 13
Topstitch with a longer stitch length around all sides of the vinyl with an 1/8” seam allowance. Repeat with the other outer rectangle.
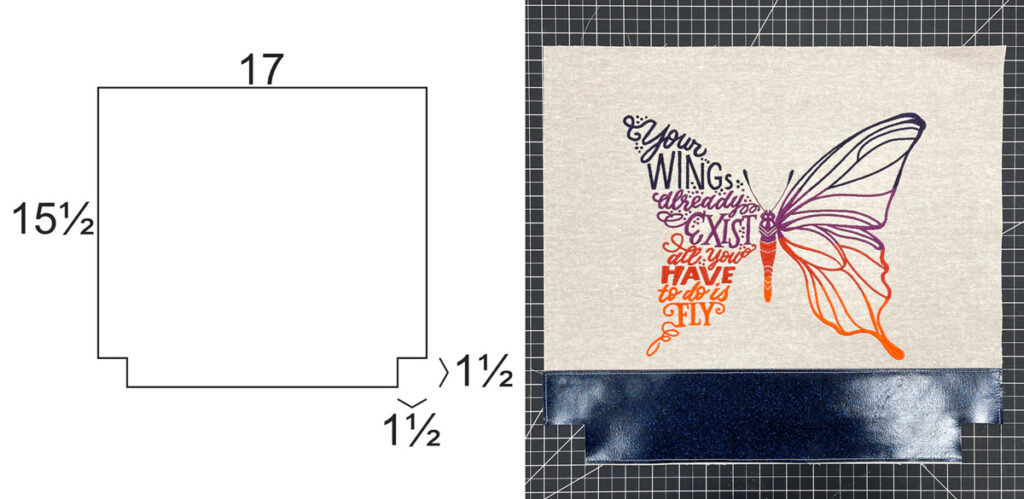
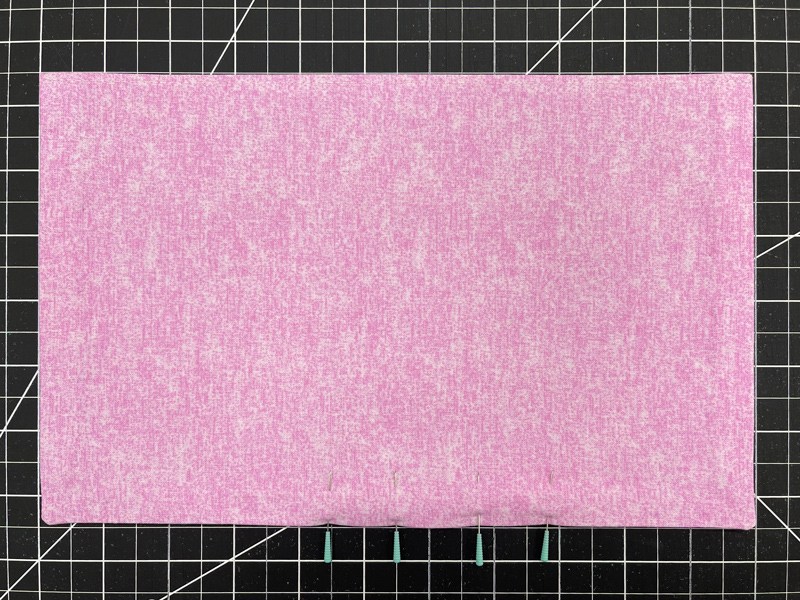
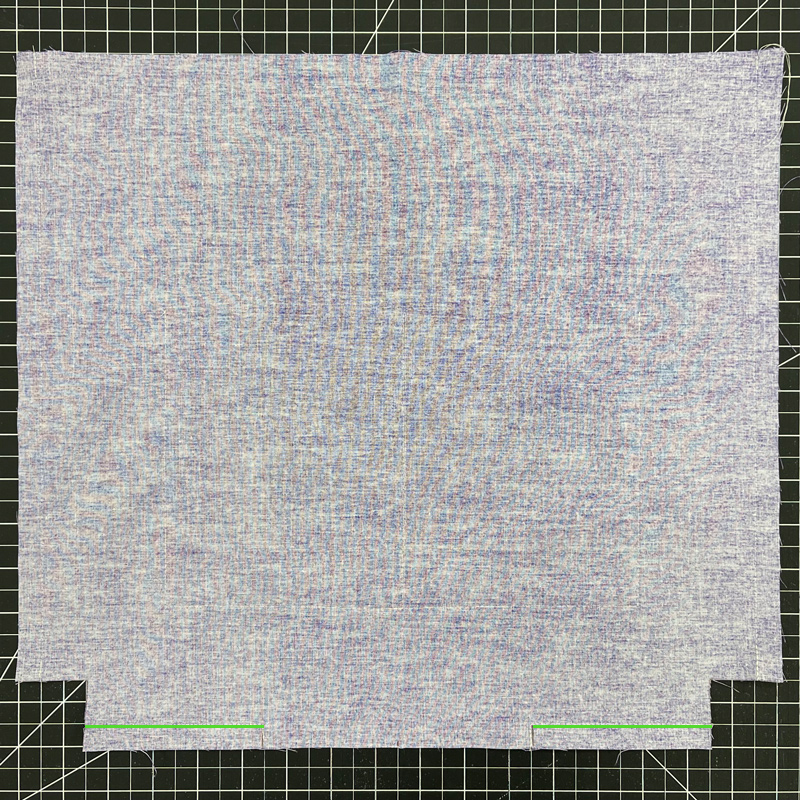
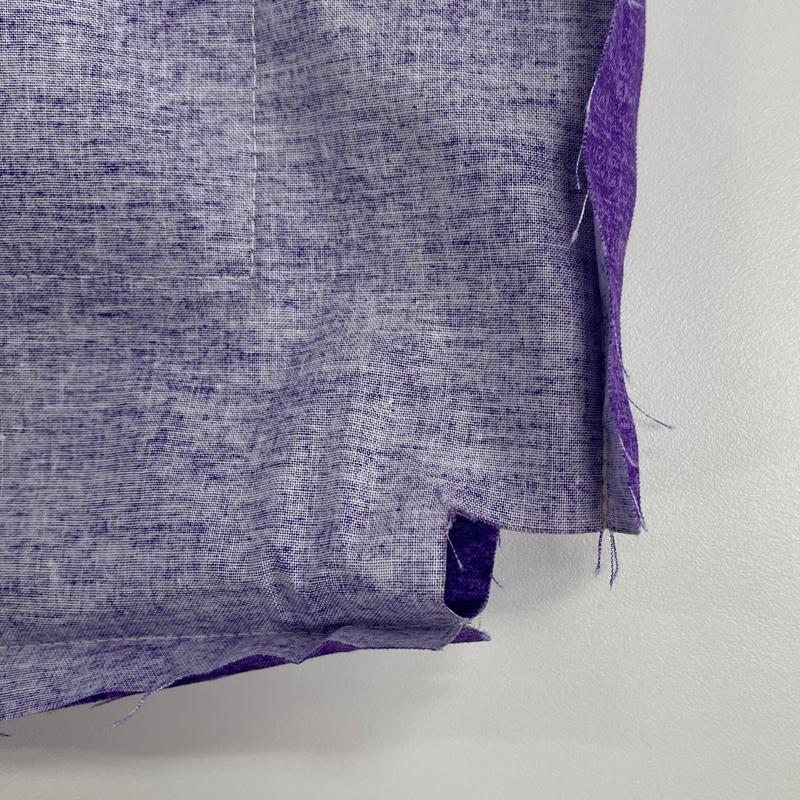
Step 14
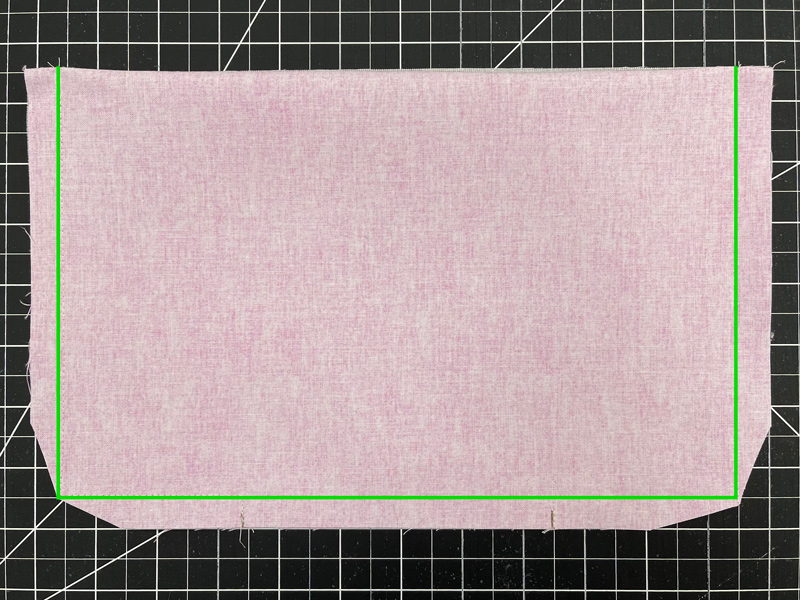
Gather the 2, 15½” x 17” outer rectangles, 2, 15½” x 17” lining rectangles. On the bottom corners of the 17” edge of the rectangles, cut 1 ½” squares as shown in the diagram. These cutouts will allow us to create boxed corners so our bag will stand up.
Creating the Straps:
Step 15
Gather the 2, 4”x 20” strap rectangles and the 2, 4” x 20” fusible woven rectangle. Fuse the Fusible Woven rectangles to the wrong side of the strap rectangles.
Step 16
Fold the long sides of one of the strap rectangles together and press to create a center crease.
Step 17
Unfold and then fold both long edges to the center crease and press them in place.

Step 18
Fold the strap in half, with the long raw edges enclosed. There should be 4 layers of fabric.

Step 19
Topstitch with a longer stitch length a 1/8” from both long edges of the strap. Repeat for the other strap.

Attaching the Straps:
Step 20
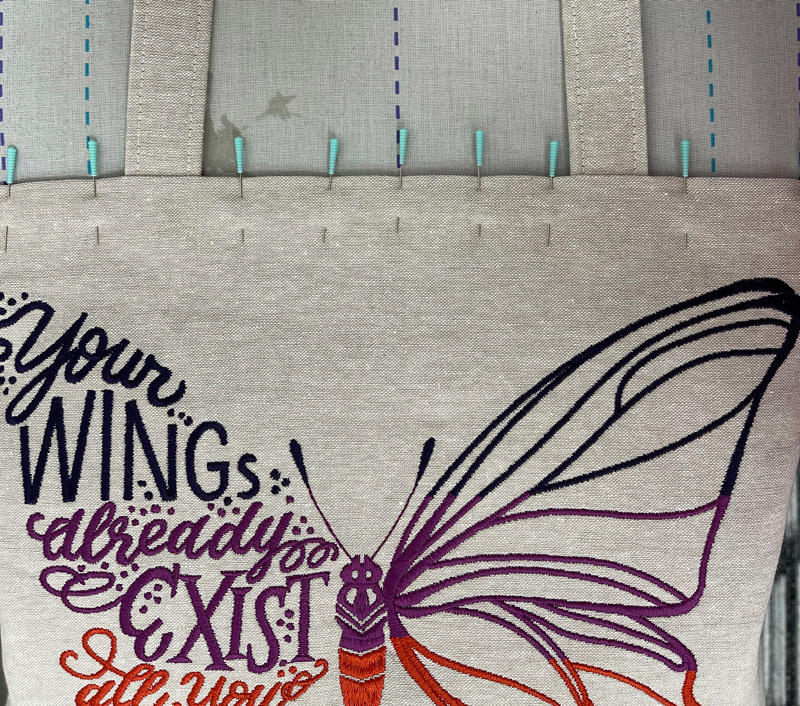
Gather the 2, 15½” by 17” outer rectangles (1 is embroidered) and the 2 straps. On the right side of the fabric, at the top of one of the outer rectangles, measure 5” in from each edge and place a small mark.
Step 21
Place the short end of the strap even with the top of the bag with the long edge inside the mark and pin or clip in place. For the best results, the center fold side of the strap should be towards the center of the bag. Making sure the strap is not twisted, line up the other end of the strap just inside the mark on the other side and pin it into place. The U-shape of the strap will lay over the outer rectangle.
Step 22
Stitch the strap into place with a ½” seam allowance. I like to sew over the straps a couple of times to reinforce them. You can also stitch it at ¼” seam allowance to add even more reinforcement.

Step 23
Repeat the above steps for the other outer rectangle.
Lining the Pocket:
Step 24
Gather the 12”x15” lining pocket rectangle and the 7½” x 12” fusible woven rectangle. Fold the 12” x 15” pocket rectangle in half so it measures 12” x 7½”. Gently press the fold into place.
Step 25
Unfold the rectangle and align one of the 12” edges of fusible woven with the center fold. Fuse the fusible woven in place. On the 12” edge without fusible woven, mark a 5” space centered. This will be the opening to turn the pocket right side out.
Step 26
Fold the pocket in half, right sides together, and stitch 3 sides (excluding the folded side) with a ½” seam allowance making sure to leave that 5” opening.
Step 27
Trim the corners and turn the pocket right side out. The expert point and press tool makes it easier to poke out the corners. Turn the seam allowance of the opening inside and press the pocket so everything is flat and even. The pocket should measure approximately 7” x 11”.
Step 28
Topstitch 1/8” from the folded top edge. The pressed closed opening will be at the bottom of the pocket.
Step 29
Gather one of the 15½” by 17” lining rectangles. Mark a line 3” from the bottom of the lining rectangle.
Step 30
Center the bottom edge of the pocket on this line and pin it in place. Sew the outside edges of the pocket onto the lining an 1/8” from the edge. Start and stop sewing by backstitching to reinforce the pocket top. Add sewn dividers if desired. I stitched a center divider line.
Sewing the Bag:
Step 31
Gather the 15½” by 17” lining rectangles and outer rectangles. Centered, on the bottom of one of the lining rectangles, mark a 6” opening on the wrong side of the fabric. This will be left open when the lining is sewn so the bag can be turn right side out through it.
Step 32
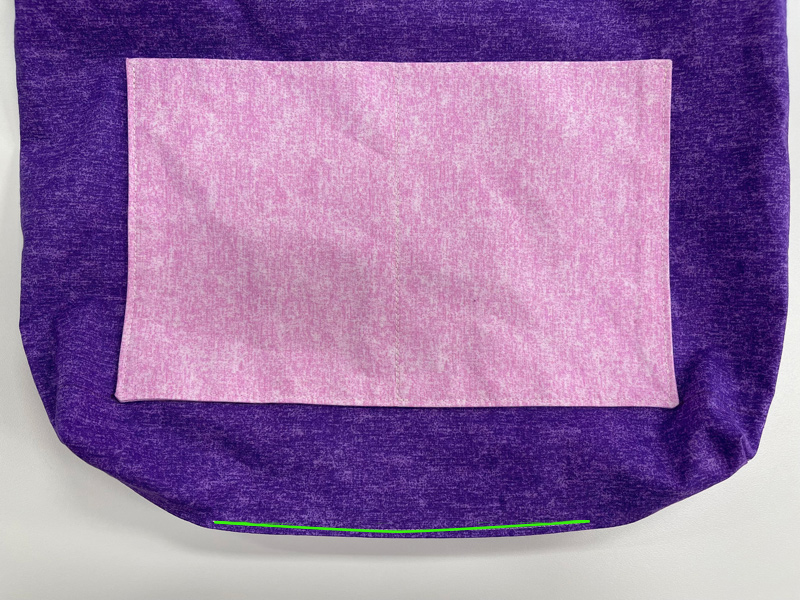
Place the two lining rectangles right sides together. Backstitching at the beginning and end, sew the sides and bottom with a ½” seam allowance. When sewing the bottom, make sure to leave the 6” opening. Do not sew the cut-out squares.
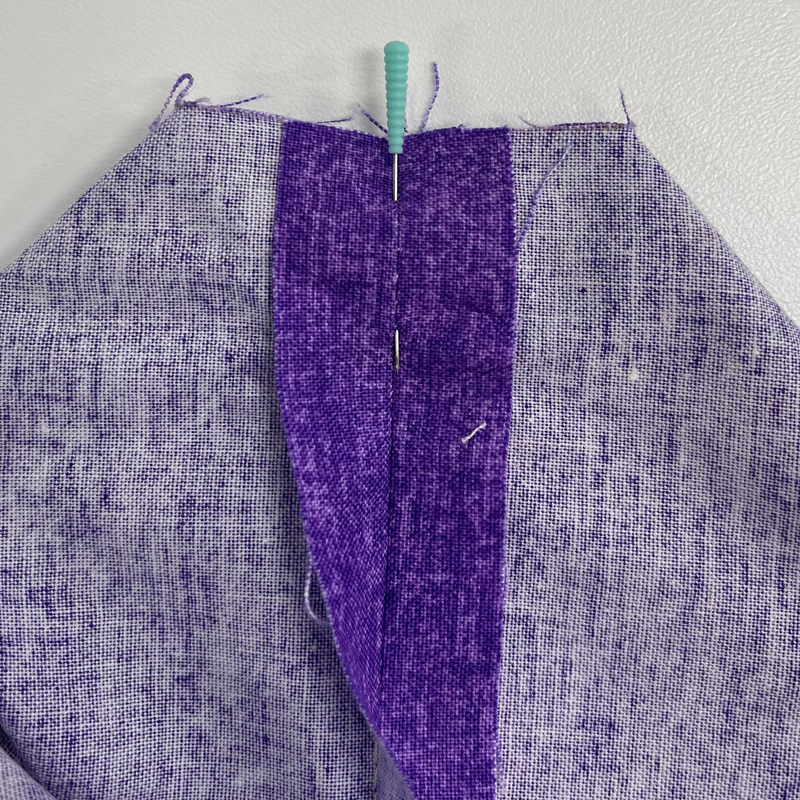
Step 33
Press the seam allowances open. In the cut-out squares, bring the side seam to meet the bottom seam. This should result in a straight line and a boxed bottom. Pin it into place.
Step 34
Stitch this with a ½” seam allowance. Repeat the above with the outer rectangles except do not leave an opening on the bottom.
Step 35

Step 36
Turn the outer fabric bag right side out. Use an iron to warm up the vinyl to make turning easier.
Step 37
Place the outside inside the lining, right sides together, aligning the top edges and side seams. I put the pocket side of the lining against the back of the bag. The handles should be between the outer and lining fabrics. Pin or clip the fabrics together.

Step 38
Sew around the top edge of the bag with a 1” seam allowance.
Step 39
Turn the bag right side out through the opening in the lining. Use an iron to warm up the vinyl to make turning easier.

Step 40
Tuck the seam allowance into the opening in the lining and stitch it closed with an 1/8” seam allowance or hand stitch it closed.
Step 41
Tuck the lining into the outside bag. Work the top seam so that the lining is almost at the top but does not show on the outside. Pin and press it.
Step 42
Topstitch with a longer stitch length around the top of the bag at 1/8” seam allowance. If desired, topstitch around the top of the bag again at a 7/8” seam allowance. Give the bag a good press and you have a completed bag!

JOIN US IN THE OESD COMMUNITY!
We hope you enjoyed this machine embroidery tutorial! Have you stitched your own Butterfly Wings Tote Bag? Come show off your work in our private Facebook group, The Perfect Stitch!