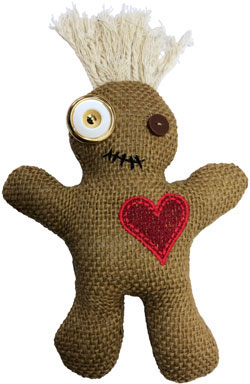
For a quick and simple project, make a unique pincushion doll from the Burlap Pincushion Dolls #12556 embroidery collection to give to your crafty friend or keep for yourself. The embroidery collection showcases two different sizes, the small one that is stitched completely in the hoop and the larger doll which requires sewing together. Be creative with the hair and button eyes. Any type of yarn can be used for the hair. The button eyes can be different colors, shapes and styles. Try using two different sizes of buttons stacked on top of each other and glue on.
Supplies
- OESD’s Burlap Pincushion Dolls #12556
- OESD AquaMesh WashAway
- OESD Applique Fuse and Fix
- Isacord Threads
- Burlap and/or cotton fabric (see collection instructions for sizes)
- 2½” sq red felt (heart applique)
- Yarn for hair
- Buttons for eyes
- Polyester fiberfill
- Hand needle
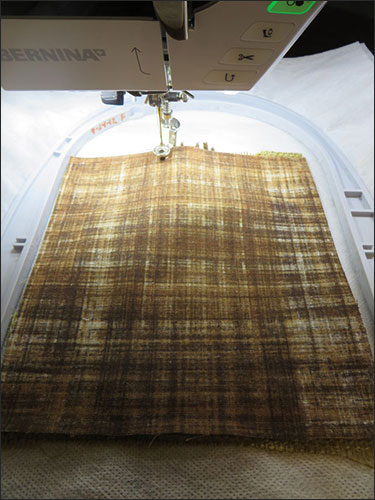
Let’s look at the basics of how these pincushion dolls are made. The complete instructions and supplies list are in the Burlap Pincushion Dolls #12556 embroidery collection. First, decide on the fabric you want to use. For our example, we used burlap fabric for the front and cotton fabric for the back. It is not advised to use the burlap fabric on the back, because of the slit in the back that must be stitched closed. Burlap is a loosely woven fabric and is not easy to stitch back together. If you don’t want to work with burlap at all, choose cotton fabrics that look like burlap for the front and back. There are so many different colors and styles that would work for the pincushion doll.
Next gather your embroidery supplies, and let’s get stitching.
This tutorial will focus on the larger doll since it has more steps. You will use embroidery files #12556-02, #12556-03 & #12556-04. Start with #12556-02 which is the Large Burlap Doll Head & Body with Applique. Fuse OESD Applique Fuse and Fix to the wrong side of the fabric for the heart applique. Cut out the applique and set it aside. Hoop two layers of AquaMesh WashAway stabilizer. Stitch the first color called Placement Stitch.
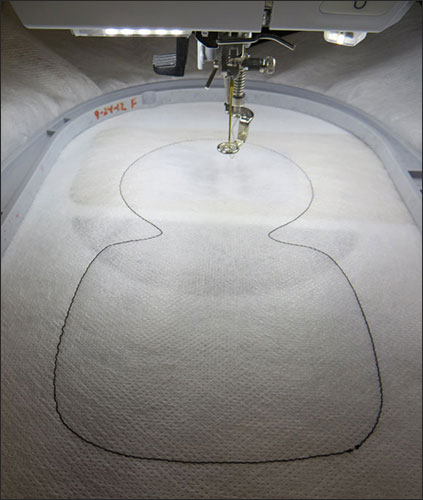
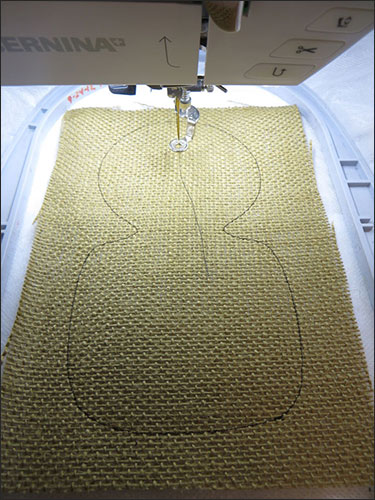
Place doll front fabric right side up onto the stabilizer, being sure to cover the Placement Stitch. Stitch the second color called Tackdown.
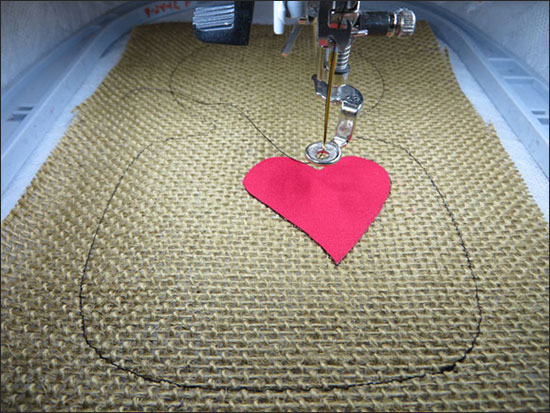
Stitch the next color called Heart Placement Stitch. Using pre-cut heart applique, peel off the paper backing and stick it over the Heart Placement Stitch.
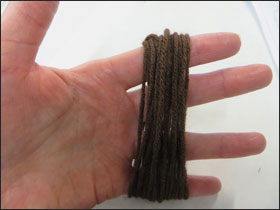
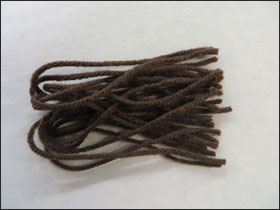
Next stitch the Heart Tackdown and Detail, then the Mouth, Button Placement, and Limb Centers and Attach Points. The next step is the hair. Using any type of yarn, or even a couple different types of yarn, wrap it around the end of your fingers about 15-18 times (or however much you want for more or less hair). Cut the loops at one end and lay the yarn out.
Use clear tape to secure the cut ends of the yarn even with the raw edge of the fabric in the center of the upper head.
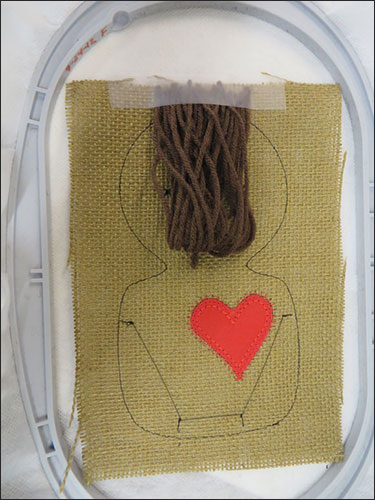
Stitch the Hair Tackdown. This will hold the hair in place. Place the doll back fabric right side down directly over the first piece.
Stitch the final Seam color using a color of thread that matches the fabrics.
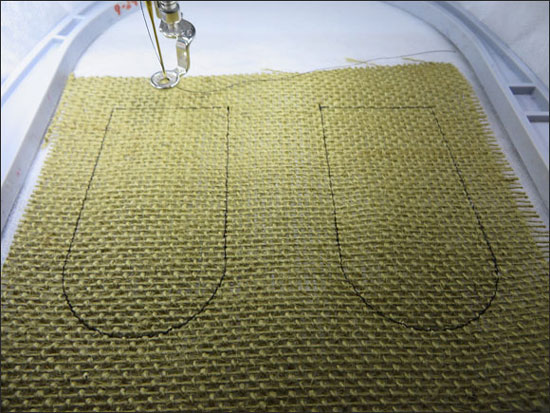
Remove the hoop from the machine and the fabric from the hoop. Stitch out the Large Burlap Doll Legs #12556-03 design file and Large Burlap Doll Arms #12556-04 design file, using two layers of AquaMesh WashAway stabilizer for each file.
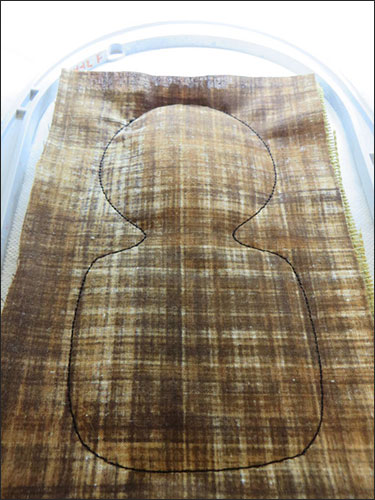
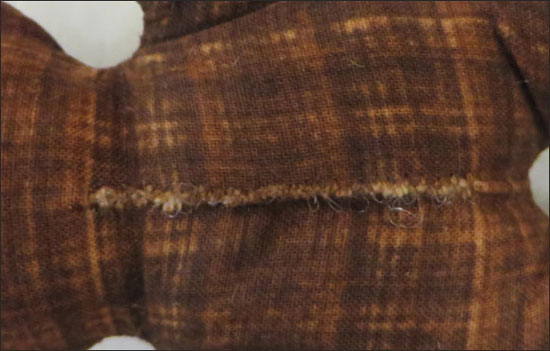
Remove the hoop from the machine and the fabric from the hoop. Carefully cut out the larger doll head and body close to the stitching line and clip curves. Pinking shears work great for this step. Cut a small slit in the back.
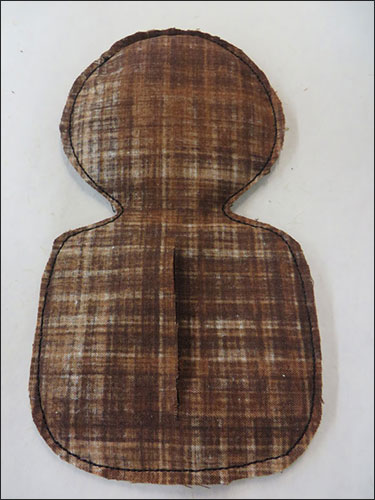
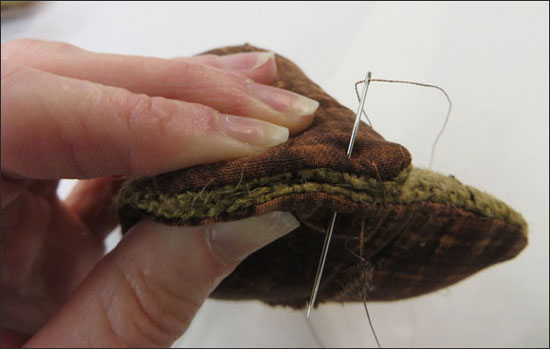
Turn the doll right side out. Using a chopstick or point turner will smooth out the curves. Stuff the doll with polyester fiberfill. NOTE: For a smooth project, use small amounts of fiberfill instead of large pieces. The larger pieces appear lumpier. Slip stitch the slit closed with a hand needle and small stitches.
Repeat this process with the arms and legs. Attach the legs, matching the legs’ centers and attach points of each leg to the bottom of the body. TIP: To make the pieces easier to sew, squish the stuffing out of the area where the limb centers and attach points are. Place the pieces right sides together and bring needle through all the layers taking close stitches one way and then crisscrossing back over the stitches. Knot to secure.
Next attach the arms, matching the arms centers and attach points of each arm to either side of the body, following the same method of stitching. Handstitch or glue the buttons on for the eyes over the Button Placement stitch.
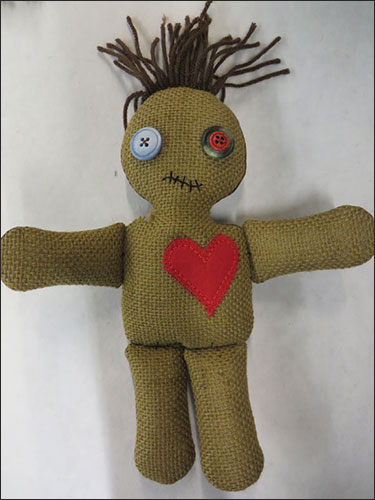
Congratulations! Your burlap pincushion doll is complete. Make several in both sizes for yourself and all your sewing friends.
This material is © OESD, LLC and may not be reproduced or published without permission.